 Pin It
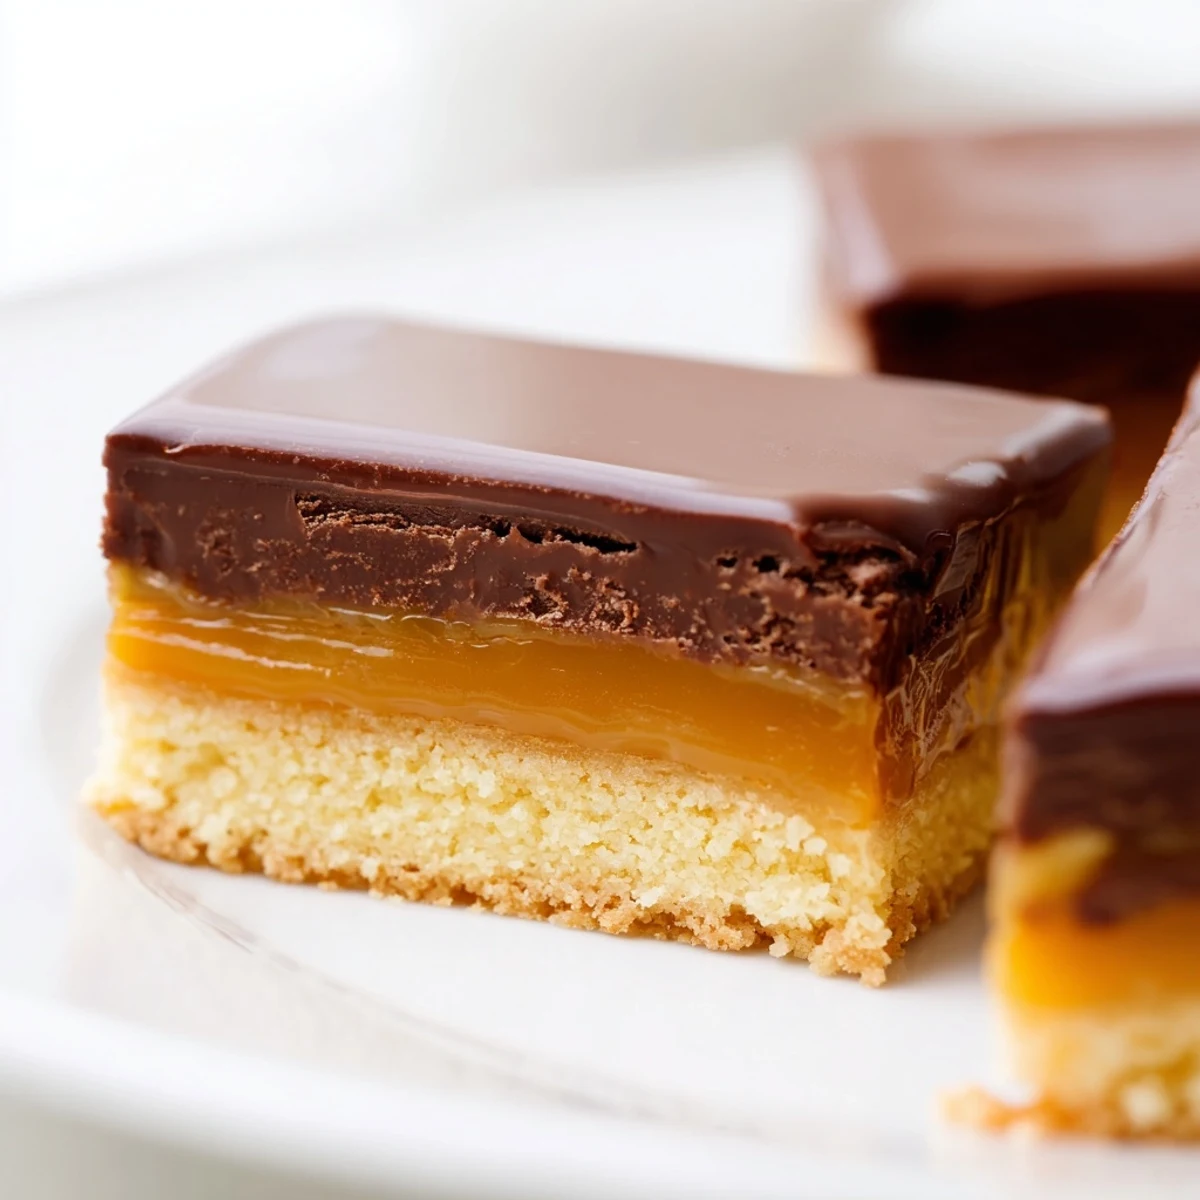
 These chocolate bars combine a crisp shortbread base with a smooth caramel layer and a rich chocolate topping. The buttery shortbread provides a sturdy yet tender foundation, while the caramel adds a sweet, slightly salted contrast. Melted chocolate completes the bars with a glossy, decadent finish. Chilling after each layer ensures perfect set and clean slices. Ideal for sharing or serving alongside coffee and dessert wine.
The first time I made these chocolate caramel bars, my kitchen filled with the most intoxicating smell of butter and sugar hitting that perfect amber stage—I almost missed it because I was too busy wiping flour off my hands. There's something magical about layering three completely different textures and watching them meld into something far greater than the sum of their parts. That night, they disappeared within hours, and I realized I'd stumbled onto something I'd be making for every celebration and quiet Tuesday afternoon for years to come.
I made these for a potluck once where everyone brought something store-bought or forgettable, and I watched someone's face transform the moment they bit through that snap of chocolate into the creamy caramel and crumbly shortbread. They asked for the recipe three times, and I kept saying 'next time' because I loved that moment of knowing I'd made something that mattered.
Ingredients
- Unsalted butter (1 cup plus 6 tablespoons total): Use cold, softened butter rather than melted—it creates pockets of air that make the shortbread tender and flaky, not dense.
- Granulated sugar (1 1/2 cups total): Measure carefully; too much makes the caramel grainy, too little and the shortbread tastes bland.
- All-purpose flour (2 cups): Don't sift unless you love extra work; just spoon and level for reliable results.
- Heavy cream (1/2 cup): Keep it at room temperature or the shock of cold cream into hot caramel can cause dangerous splattering—learned that the hard way.
- Semisweet chocolate (7 oz): Chop it yourself from a bar if you can; chocolate chips contain additives that prevent proper melting and glossiness.
- Salt (3/4 teaspoon total): Use fine sea salt in the caramel and consider flaky sea salt on top for a sophisticated finish.
Instructions
- Prepare your pan and heat the oven:
- Line your 8-inch square pan with parchment paper, letting it hang over two sides for easy removal later. Preheat to 350°F while you gather your ingredients—this takes about 10 minutes and ensures even baking.
- Make the shortbread base:
- Cream softened butter and sugar until the mixture looks pale and fluffy, about 3 minutes with an electric mixer. Add flour and salt, stirring until the dough just comes together in a shaggy mass; don't overmix or your shortbread will be tough instead of tender.
- Bake the shortbread:
- Press the dough evenly into your prepared pan using your fingers or the bottom of a measuring cup, working gently to avoid compacting it. Bake for 18 to 20 minutes until the edges are barely golden and the center still looks pale—it will continue cooking slightly as it cools.
- Cook the caramel to perfection:
- Pour granulated sugar into a medium saucepan without any liquid and turn heat to medium. Stir constantly, watching for the sugar to melt from the edges inward into a deep amber color—this takes patience, usually 8 to 10 minutes, but stop the moment it smells like butterscotch or you've gone too far.
- Add cream carefully:
- Once the sugar is amber, remove from heat and stir in cubed butter until melted. Slowly pour in room-temperature heavy cream while stirring constantly; it will bubble violently at first, so go slowly and don't panic.
- Chill the caramel layer:
- Pour the caramel over your cooled shortbread and refrigerate for at least 45 minutes until completely set and firm to the touch. This step prevents the caramel from oozing when you cut later.
- Melt and spread the chocolate:
- Chop your chocolate into small, even pieces and melt it with butter using either a double boiler or 30-second bursts in the microwave, stirring between each burst. Spread the smooth, glossy chocolate evenly over the chilled caramel layer using an offset spatula or the back of a spoon.
- Final chill and cut:
- Refrigerate for at least 30 minutes until the chocolate is firm enough to hold its shape when cut. Use a hot, sharp knife wiped clean between each cut for clean, professional-looking edges.
 Pin It
 There was an evening when my neighbor came by and mentioned she hadn't had anything homemade in weeks, and I wrapped up some of these bars for her to take home. She texted me the next morning saying she'd eaten three before realizing it, and somehow that small moment of bringing someone unexpected joy made me understand why I keep coming back to this recipe.
The Magic of Three Layers
What makes these bars so craveable isn't just that they taste good—it's the contrast between a crumbly, buttery foundation that practically dissolves on your tongue, a smooth caramel that's simultaneously silky and slightly chewy, and a thin shell of chocolate that snaps satisfyingly between your teeth. I've learned that each layer needs its own moment of attention; rushing or skipping steps means you lose that dialogue between textures.
Making Caramel Without Fear
The first time I made caramel, I was convinced I'd either burn it or somehow mess up sugar and heat, but there's actually something meditative about watching it transform from white crystals to liquid gold if you respect the process. Keep your cream at room temperature, stir constantly, and trust that amber is the color you're after—not brown, not light yellow, but genuine caramel the color of a penny held up to sunlight.
Variations and Personal Touches
Once you've mastered the basic three-layer structure, these bars become a canvas for experimentation without losing their essential charm. I've sprinkled flaky sea salt over the caramel before adding chocolate, swapped the semisweet for dark chocolate when I wanted something less sweet, and even drizzled white chocolate in thin lines across the top because sometimes you want to be fancy. The shortbread base never changes—that's sacred—but the top two layers are yours to play with depending on what you're craving or who you're making them for.
- Try mixing a pinch of espresso powder into your chocolate before melting for a sophisticated depth without tasting like coffee.
- Press a few crushed pretzels or fleur de sel into the top layer of chocolate while it's still tacky for a sweet-salty contrast that'll have people asking what your secret is.
- Keep them wrapped tightly in the fridge; they'll stay fresh for a solid week and actually taste better after a day or two once all the flavors settle together.
 Pin It
 Every time I make these, I'm reminded that the best desserts aren't the ones with the longest ingredient lists or the fanciest techniques—they're the ones that feel generous when you share them and taste like someone cared enough to get the little details right. Make these, and you'll understand why.
Recipe FAQs
- → What type of chocolate works best for the topping?
-
Semisweet chocolate offers a balanced sweetness, but you can use dark chocolate for a richer taste or milk chocolate for extra sweetness.
- → How can I achieve a smooth caramel layer?
-
Constant stirring during the sugar melting and careful addition of butter and cream ensure a silky, lump-free caramel.
- → Can I add sea salt to these bars?
-
Sprinkling flaky sea salt over the caramel before the chocolate layer enhances the flavor with a subtle salty contrast.
- → What is the best way to cut the bars cleanly?
-
Use a sharp knife and wipe the blade between cuts to maintain clean edges and prevent sticking.
- → How should I store these bars?
-
Keep them in an airtight container in the refrigerator for up to five days to maintain freshness and texture.
