 Pin It
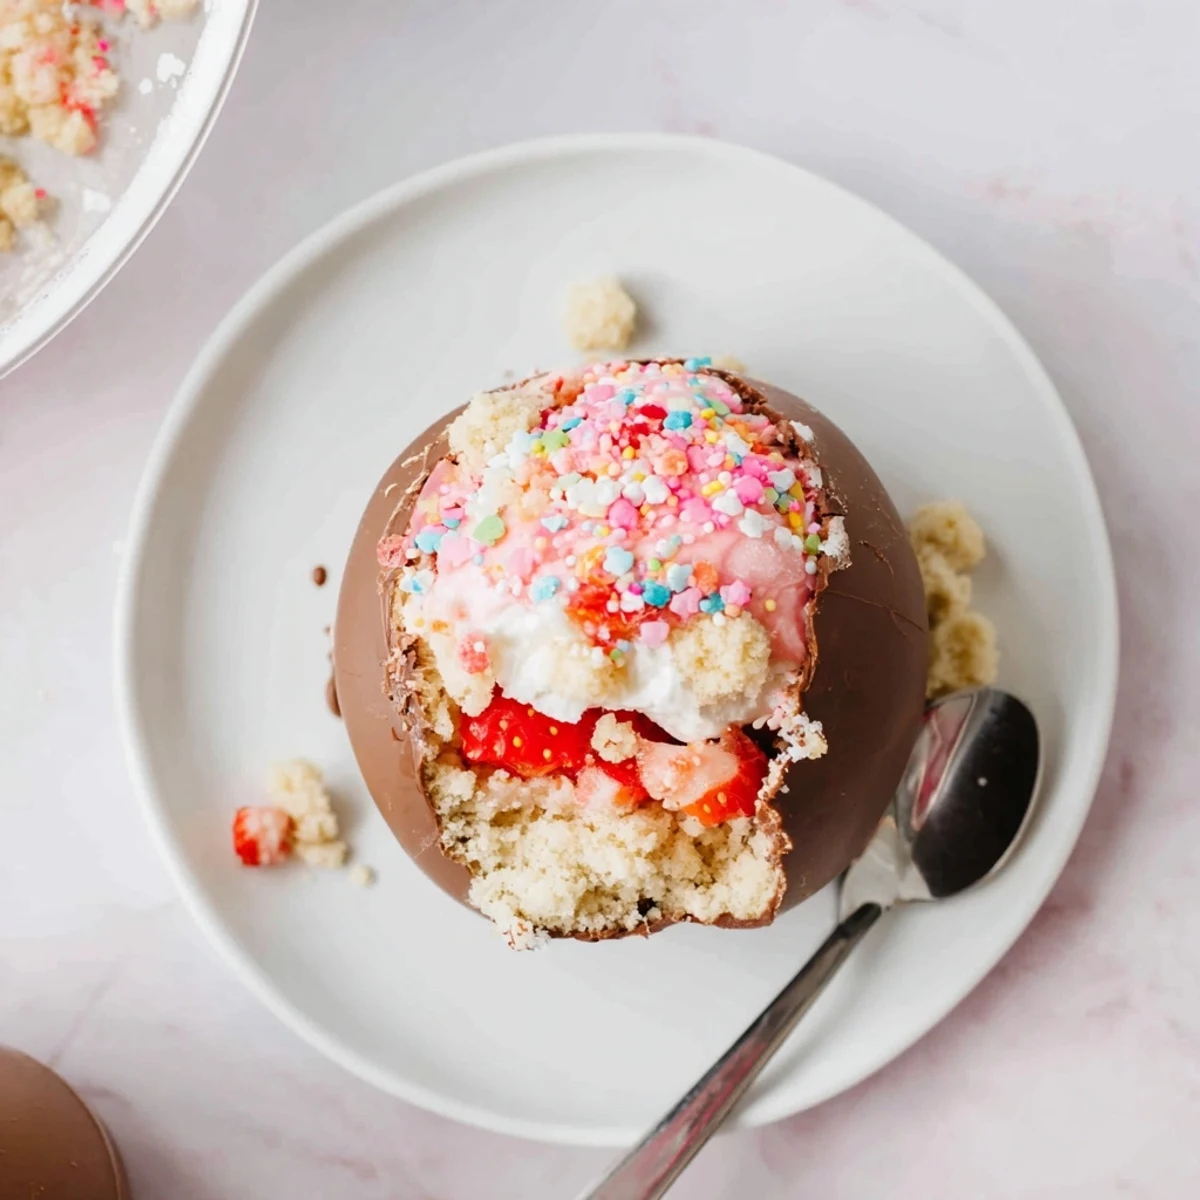
 These delightful Easter egg bombs combine all the beloved elements of strawberry shortcake—tender buttery cake, sweet macerated berries, and light whipped cream—inside crisp chocolate egg shells. The surprise hidden center makes them perfect for Easter brunch or spring gatherings.
The process involves baking classic shortcake rounds, preparing fresh strawberry filling, and whipping sweetened cream. Chocolate egg shells are created using silicone molds, then filled with the layered components before being sealed with a second chocolate half.
These treats capture the essence of spring with fresh strawberries and playful presentation. The contrast between the crisp chocolate shell and soft, creamy interior creates an irresistible texture combination.
The rain was tapping against my kitchen window last spring when I decided these Easter egg bombs needed to happen. Id been staring at my silicone egg molds for weeks, wondering what magic I could tuck inside that chocolate shell. My daughter walked in just as the first batch of shortcake came out of the oven, buttery and golden, and immediately started plotting with me about layers.
I served these at our family Easter dinner last year, and my usually stoic father actually gasped when he bit into his first egg. The table went quiet for about ten seconds while everyone processed the combination of textures. Now my sister texts me in February asking if I will be making them again.
Ingredients
- All-purpose flour: The foundation of tender shortcake, do not pack it down when measuring
- Cold butter: Those tiny butter pockets melting in the oven create the flaky layers we want
- Heavy cream: Use the real stuff, the fat content carries all the vanilla flavor
- Fresh strawberries: Let them macerate until they release their juices, that is the liquid gold soaking into our cake
- Good chocolate: Since the shell is half the experience, use chocolate you would eat straight from the bar
Instructions
- Build the shortcake base:
- Whisk flour, sugar, baking powder, and salt in a large bowl until combined. Cut cold butter into the mixture until it looks like coarse crumbs with some pea-sized pieces remaining. Whisk egg, cream, and vanilla separately, then pour into the flour mixture and stir gently until just combined.
- Bake until golden:
- Pat the dough into a 1-inch thick circle on a floured surface. Cut rounds with a 2-inch cutter and bake at 400°F for 12 to 15 minutes until they turn golden brown. Let them cool completely, then break into bite-sized pieces for layering.
- Prep the strawberry filling:
- Toss diced strawberries with sugar and lemon juice in a bowl. Let them sit for 10 to 15 minutes until they are swimming in their own juices.
- Whip the cream:
- Beat heavy cream with powdered sugar and vanilla until soft peaks form. Keep it chilled until you are ready to assemble everything.
- Create chocolate shells:
- Melt chocolate over simmering water, stirring until completely smooth. Brush the inside of Easter egg molds with a generous layer, chill for 10 minutes, then add a second coat for sturdiness.
- Assemble the bombs:
- Gently unmold the chocolate shells and layer crumbled shortcake, macerated strawberries, and whipped cream inside half of them. Press another chocolate half on top to seal the eggs.
 Pin It
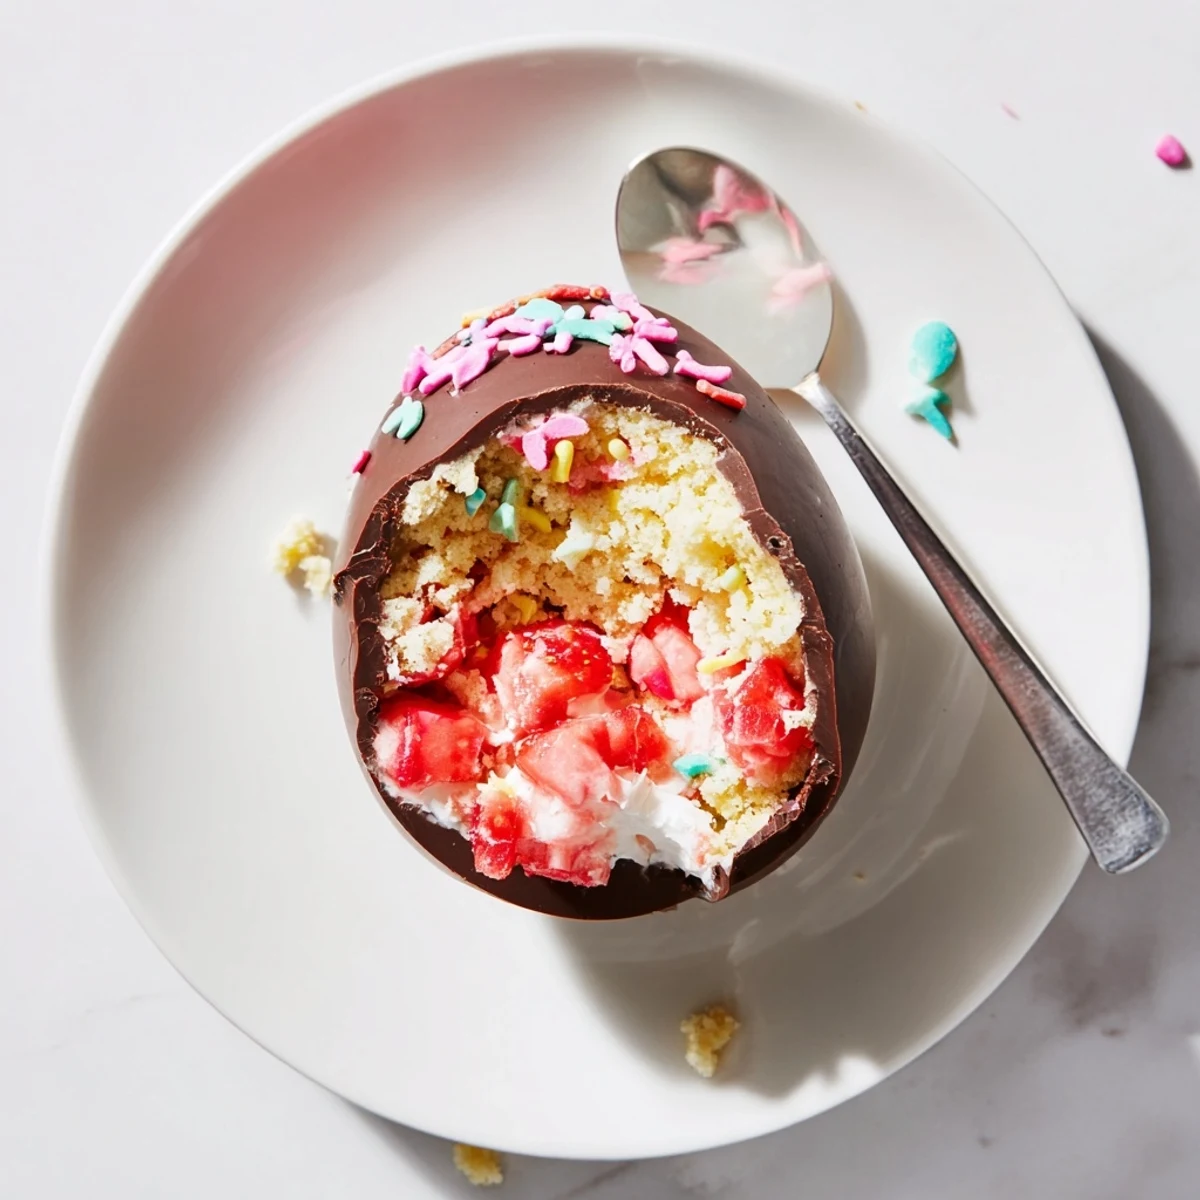
 Something magical happens when you hand someone a whole chocolate egg and watch them discover what is inside. My niece still talks about the strawberry explosion she encountered last April.
Making Them Ahead
You can bake the shortcake and prepare the strawberry filling a day in advance. Just store the crumbled cake in an airtight container and keep the strawberries refrigerated. The chocolate shells can also be made ahead and stored in the fridge between parchment paper layers.
Chocolate Shell Success
Work quickly when brushing the chocolate into the molds, and make sure your molds are completely dry before starting. Any water droplets will seize the chocolate and ruin the smooth finish you are after.
Assembly Strategy
Set up an assembly line with all your components ready. I like to have a small spoon for the strawberries and clean hands for gently pressing the halves together. The pressure should be firm but not aggressive.
- Have extra whipped cream ready for patching any small cracks that appear during assembly
- Work with one egg at a time once you start layering to keep everything cold
- Place the finished bombs back in the fridge immediately to set the seals
 Pin It
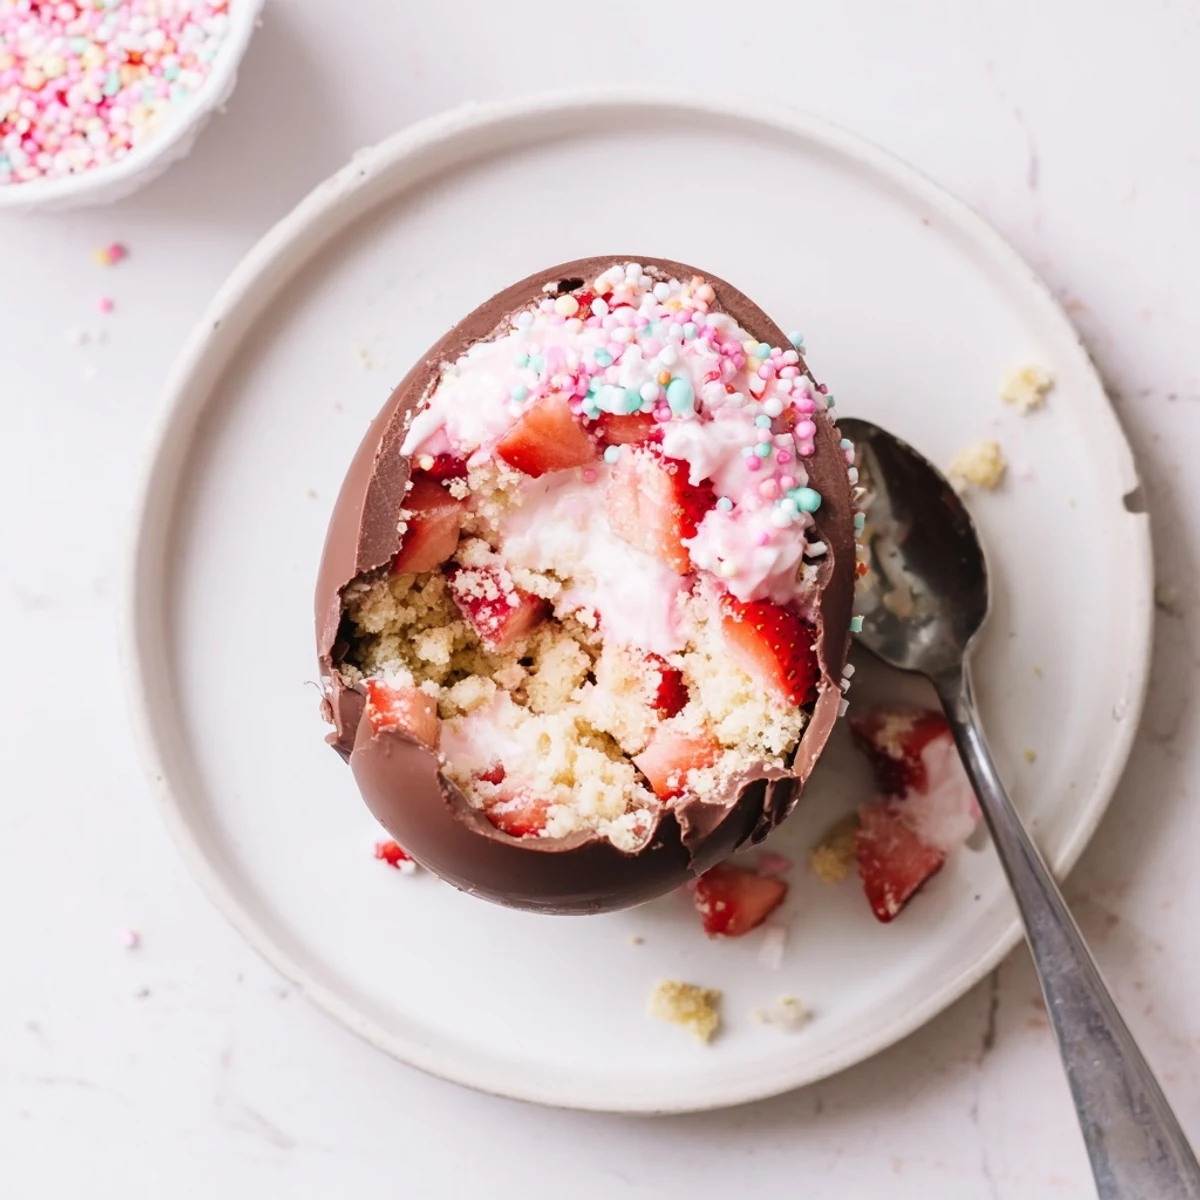
 These strawberry shortcake Easter egg bombs are what happens when you let your inner child take over the kitchen. Enjoy every surprised face around your table this spring.
Recipe FAQs
- → How far in advance can I make these egg bombs?
-
For the freshest texture, assemble these within 2-3 hours of serving. You can prepare the shortcake, strawberry filling, and whipped cream up to a day ahead. Chocolate shells can be made 2-3 days in advance and stored in an airtight container at room temperature.
- → What type of chocolate works best for the shells?
-
White chocolate provides a beautiful contrast to the red strawberries, while milk chocolate offers a classic flavor combination. Use high-quality melting chocolate or chocolate wafers for the smoothest results and sturdy shells that release easily from molds.
- → Can I use different fruits in the filling?
-
Absolutely. Raspberries, blueberries, or a mix of berries work wonderfully. Peaches or mangos would be delicious for a spring variation. Adjust the sugar slightly based on fruit sweetness and maintain the maceration step for the best texture.
- → Do I need special molds to make the chocolate shells?
-
Two-part Easter egg silicone molds are ideal for creating professional-looking bombs. They come in various sizes—choose ones that hold about 1/2 cup per half for the best ratio. If unavailable, large silicone egg-shaped chocolate molds can work, though assembly requires more precision.
- → How do I prevent the chocolate shells from cracking?
-
Apply two coats of chocolate, chilling thoroughly between each. This creates a sturdy shell less prone to cracks. When filling, don't overstuff—leave a small gap near the edges so the two halves can seal properly without breaking. Handle gently when unmolding and assembling.
