 Pin It
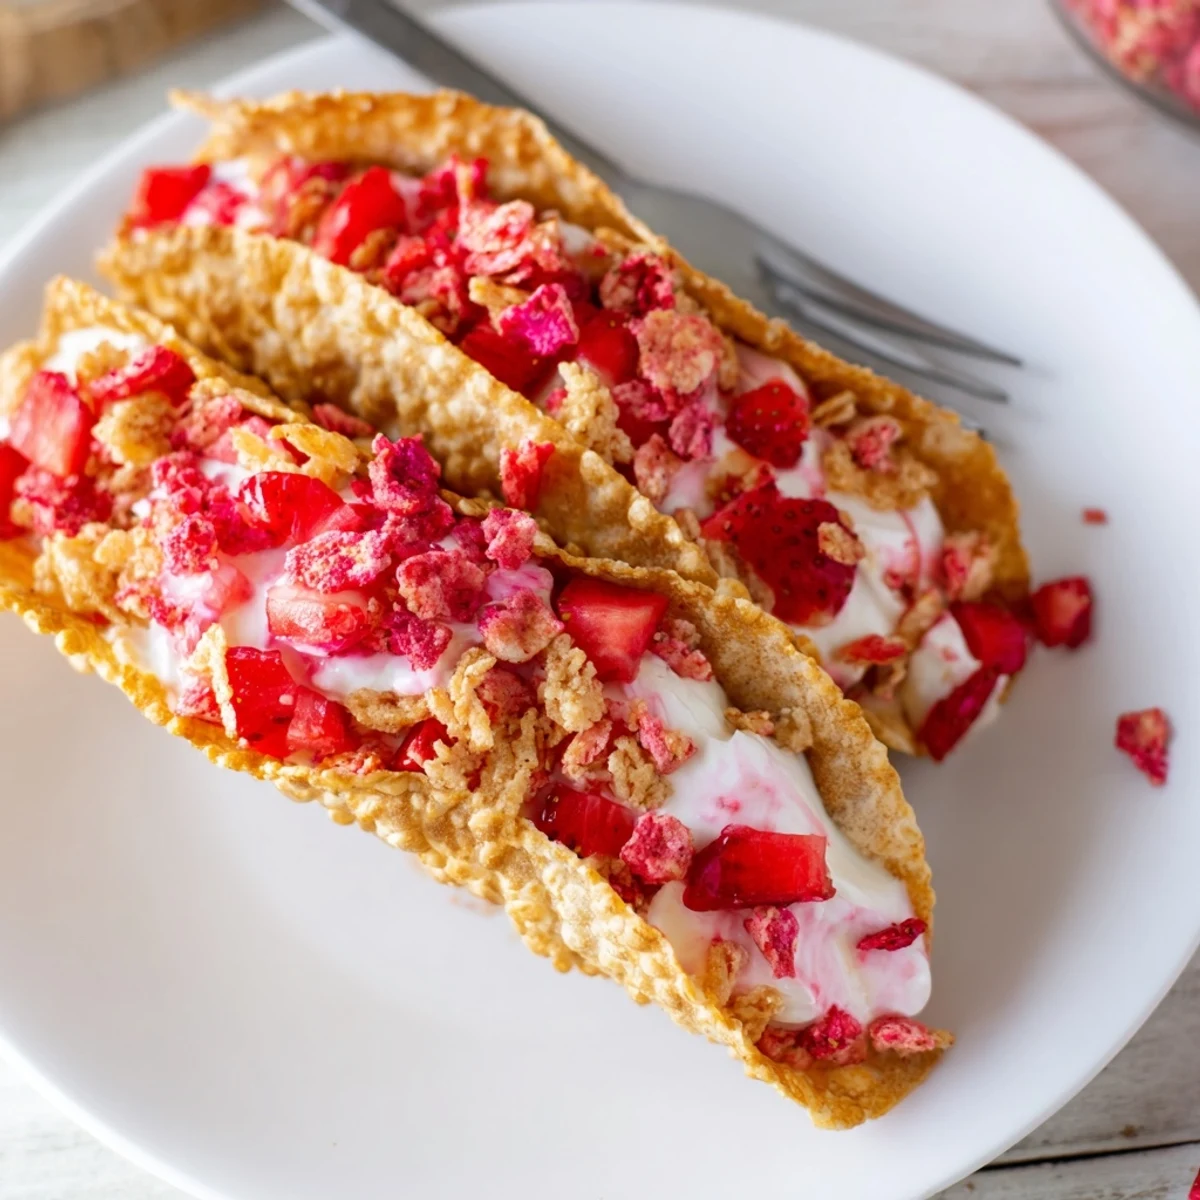
 These strawberry crunch cheesecake tacos combine crispy baked flour tortilla shells with a light, creamy cheesecake mousse filling. The shells are brushed with butter and sprinkled with cinnamon sugar before being baked until golden and crisp.
Each taco is generously filled with the whipped cheesecake mixture, then topped with a crunchy blend of crushed freeze-dried strawberries and crispy rice cereal. Fresh diced strawberries add a bright finishing touch. Ready in just 35 minutes, they're best served immediately to maintain that satisfying crunch.
My niece challenged me to bring something wild to her birthday potluck, and these strawberry crunch cheesecake tacos stopped every conversation in the room. Crispy cinnamon sugar shells cradling fluffy cheesecake mousse, all buried under a strawberry crumble that crunches like childhood cereal on a Saturday morning. Thirty five minutes later I had a dessert that looked like it came from a food truck. People kept asking where I ordered them from.
I made these again on a rainy Tuesday just because the freezer had tortillas and the pantry had freeze dried strawberries from a forgotten snack phase. My partner walked in, saw me draping tortillas over the oven rack, and asked if I had lost my mind. Three tacos later he was already texting his brother about them.
Ingredients
- 8 small flour tortillas: The smaller ones are easier to shape and eat without everything tumbling out.
- 2 tbsp unsalted butter, melted: Brushed on generously, this is what gives the shells their golden crunch.
- 2 tbsp granulated sugar: Combines with cinnamon for that churro like coating on the shells.
- 1 tsp ground cinnamon: A warm spice note that bridges the gap between the crispy shell and creamy filling.
- 225 g cream cheese, softened: Full fat and properly softened makes the smoothest mousse without lumps.
- 120 ml heavy cream: Whipped and folded in for that light airy texture that feels like a cloud.
- 60 g granulated sugar: Just enough sweetness without overwhelming the natural strawberry flavor.
- 1 tsp vanilla extract: Use the real stuff here, it rounds out every flavor beautifully.
- 120 g freeze dried strawberries: These concentrate all the berry flavor into a crunchy topping that actually stays crisp.
- 100 g crispy rice cereal: The secret to that nostalgic crunch that makes people close their eyes when they bite in.
- 2 tbsp unsalted butter, melted (for topping): Binds the crumble together so it clings to the cheesecake.
- 2 tbsp granulated sugar (for topping): Adds a caramelized sweetness to the strawberry crunch.
- 150 g fresh strawberries, diced: A juicy fresh finish that brightens every bite.
Instructions
- Shape and bake the taco shells:
- Preheat your oven to 180 degrees Celsius. Brush each tortilla with melted butter, sprinkle with cinnamon sugar, and gently drape them over the bars of your oven rack so they sag into a taco curve. Bake 7 to 9 minutes until golden and crisp, then let them cool completely before filling.
- Whip up the cheesecake mousse:
- Beat the softened cream cheese with sugar and vanilla until completely smooth with no lumps remaining. In a separate bowl, whip the heavy cream to medium peaks, then gently fold it into the cream cheese mixture with a spatula until just combined. Transfer to a piping bag for neat filling or simply spoon it in.
- Build the strawberry crunch:
- Pulse the freeze dried strawberries and crispy rice cereal in a food processor until you get a coarse crumb with some texture remaining. Pour in the melted butter and sugar, then pulse once or twice more to bring it all together.
- Fill and finish the tacos:
- Pipe or spoon the cheesecake mousse generously into each cooled shell. Sprinkle the strawberry crunch topping over the mousse, pressing gently so it sticks. Scatter fresh diced strawberries on top for a burst of color and freshness.
- Serve immediately:
- These are at their absolute best the moment they are assembled, when the shells are still crisp and the mousse is cold. Arrange them on a platter and watch them disappear within minutes.
 Pin It
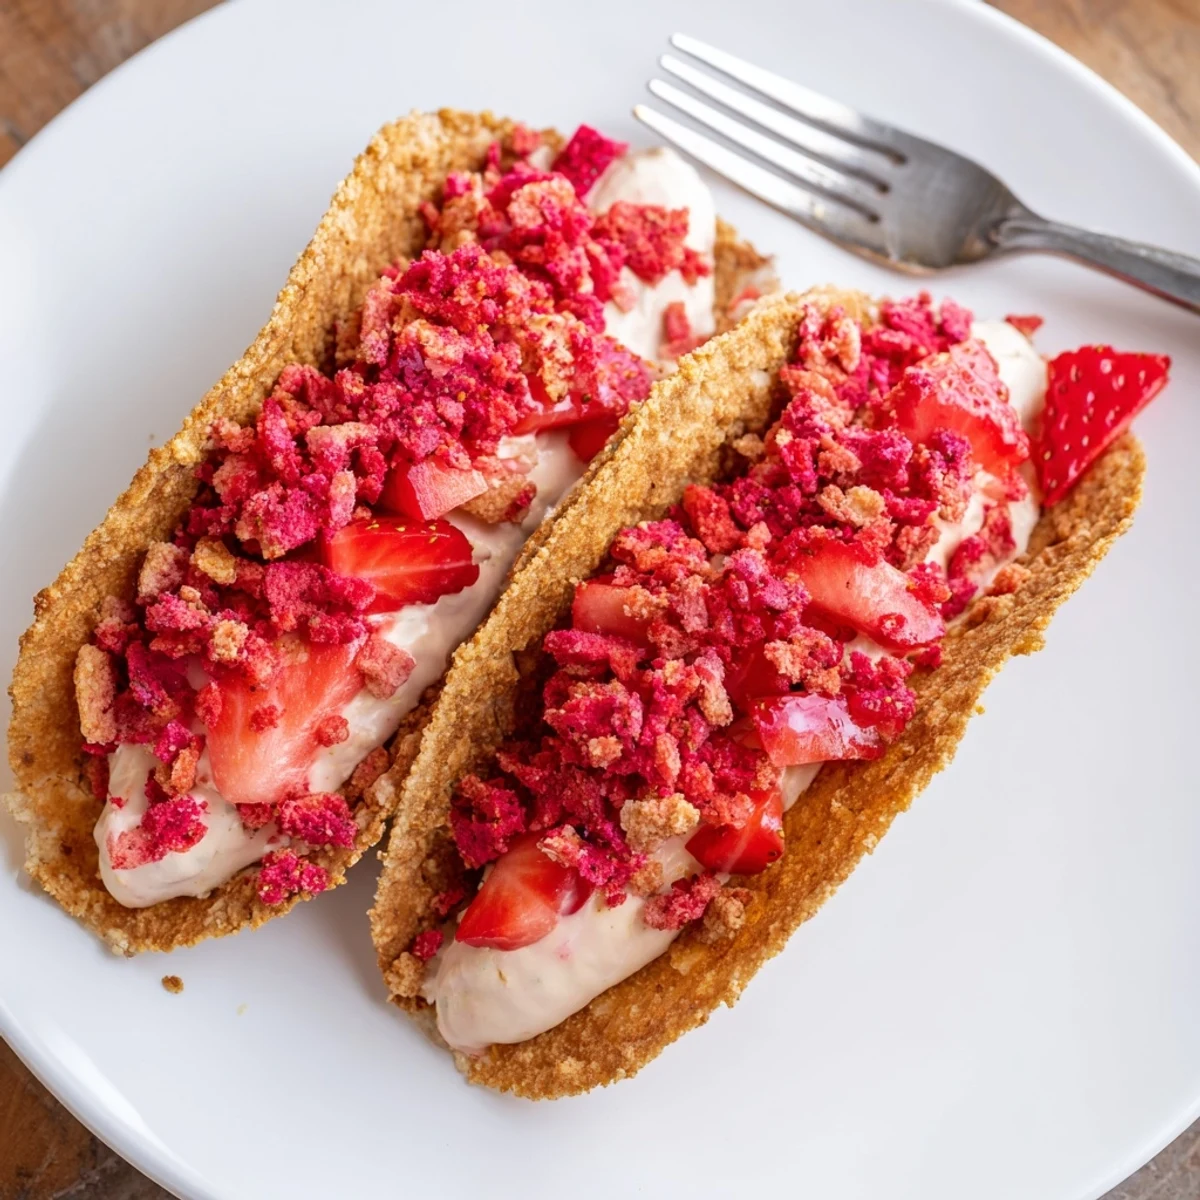
 There is something magical about watching someone bite into a dessert taco for the first time, the way their eyebrows go up at the crunch and then settle into pure satisfaction. These little handheld treats turned a casual potluck into a memory I still get thanked for.
Getting the Shell Shape Right
Draping tortillas over oven rack bars feels risky the first time, but it creates the most natural taco curve you can imagine. If your oven racks are too wide apart, try setting a cooling rack on top of a baking tray and draping the tortillas over parallel wooden spoons propped inside. The goal is a shell with an open top wide enough to fill but curved enough to hold everything together when picked up.
Making the Mousse Silky Smooth
The biggest mistake I made was rushing the cream cheese softening step, ending up with tiny stubborn lumps no amount of mixing could fix. Let it sit at room temperature for at least an hour, or cut it into small cubes and wait thirty minutes. When folding in the whipped cream, use a gentle hand and stop the moment everything looks uniform.
Serving and Storage
Keep the components separate until you are ready to eat and the whole dessert comes together in under five minutes. The strawberry crunch topping stores beautifully in an airtight container at room temperature for up to a week. The cheesecake mousse holds well in the fridge for two days covered tightly, and the baked shells stay crisp in a sealed bag for three days.
- A drizzle of melted white chocolate over the top takes these from backyard party to dinner party.
- Gluten free tortillas work perfectly here, making this easily adaptable for friends with sensitivities.
- Always make a few extra shells because at least one always breaks or gets eaten warm before filling.
 Pin It
 Some recipes become favorites because they taste incredible, and others because they make people smile the moment they see them. These cheesecake tacos do both, and that is why they have earned a permanent spot in my dessert rotation.
Recipe FAQs
- → Can I make the taco shells ahead of time?
-
Yes, you can bake the taco shells a day in advance. Store them in an airtight container at room temperature to keep them crisp. Avoid assembling the tacos until just before serving, as the cheesecake filling will soften the shells over time.
- → What can I substitute for freeze-dried strawberries?
-
If freeze-dried strawberries aren't available, you can crush strawberry-flavored sandwich cookies or graham crackers mixed with a bit of strawberry jam. The texture will differ slightly, but the strawberry flavor will still come through nicely.
- → How do I get the taco shell shape in the oven?
-
Simply drape the buttered tortillas over the bars of your oven rack. The tortillas will bake and harden into a curved taco shape. Alternatively, you can place them between the cups of an inverted muffin tin for a similar curved effect.
- → Can I use corn tortillas instead of flour?
-
Flour tortillas work best because they become crisp while retaining a tender texture. Corn tortillas tend to become too hard and may crack when filled. If using corn tortillas, warm them slightly before shaping to prevent breaking.
- → How should I store leftovers?
-
Leftover assembled tacos don't store well because the filling softens the shells. Instead, store each component separately in the refrigerator. Keep the shells at room temperature in a sealed container, and refrigerate the cheesecake filling and strawberry crunch topping for up to 3 days.
- → Can I make this without a food processor?
-
Absolutely. Place the freeze-dried strawberries and rice cereal in a sealed zip-top bag and crush them with a rolling pin or heavy pan until you reach a crumbly consistency. This method works just as well as a food processor.
