 Pin It
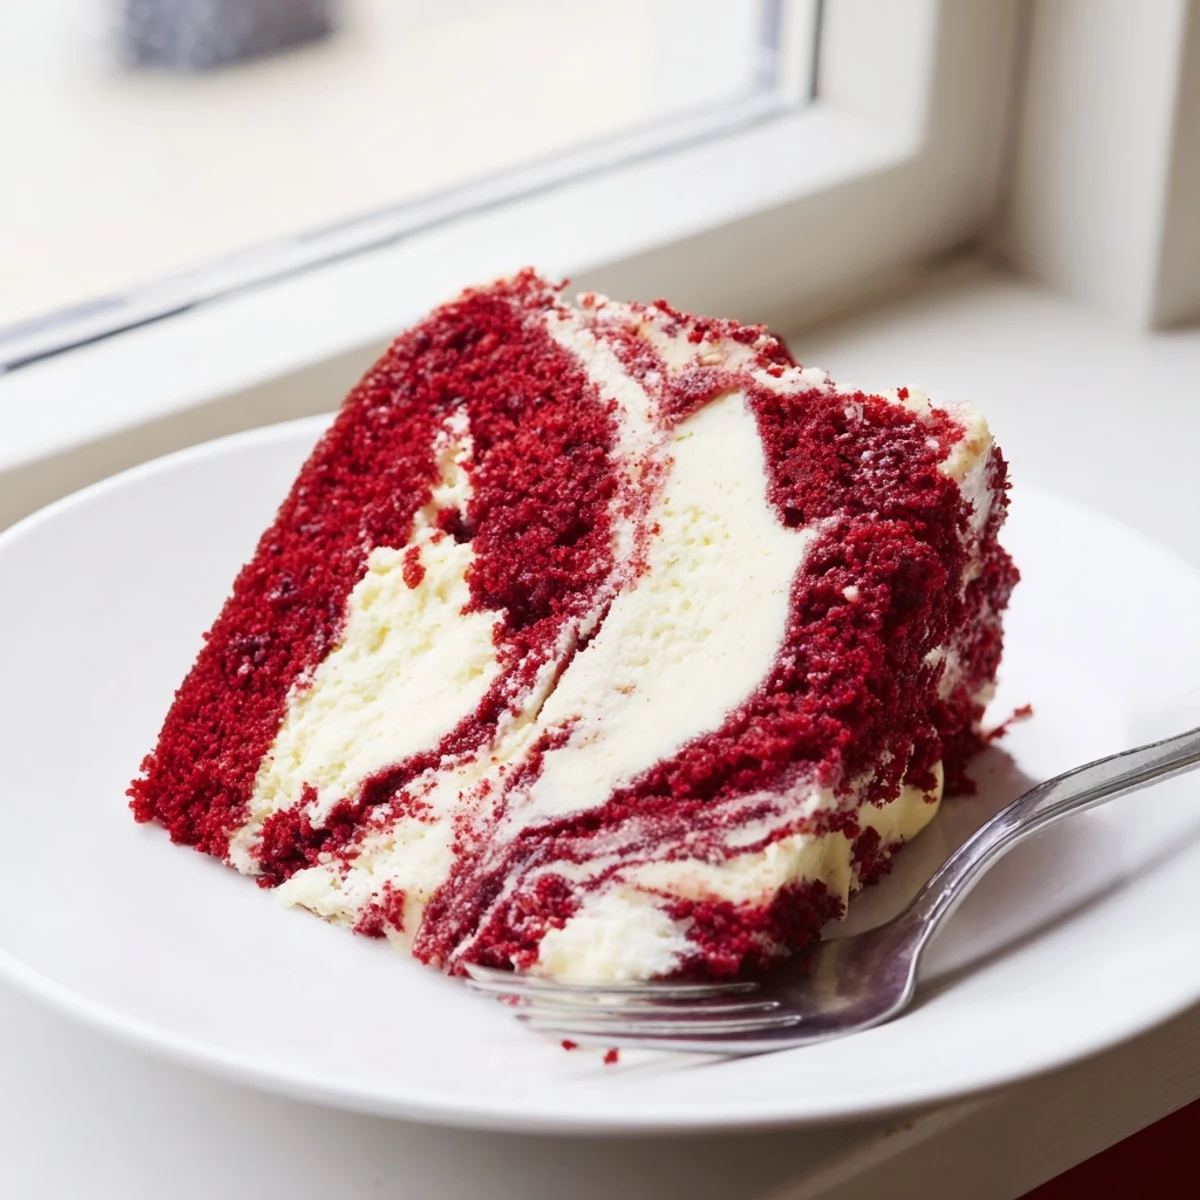
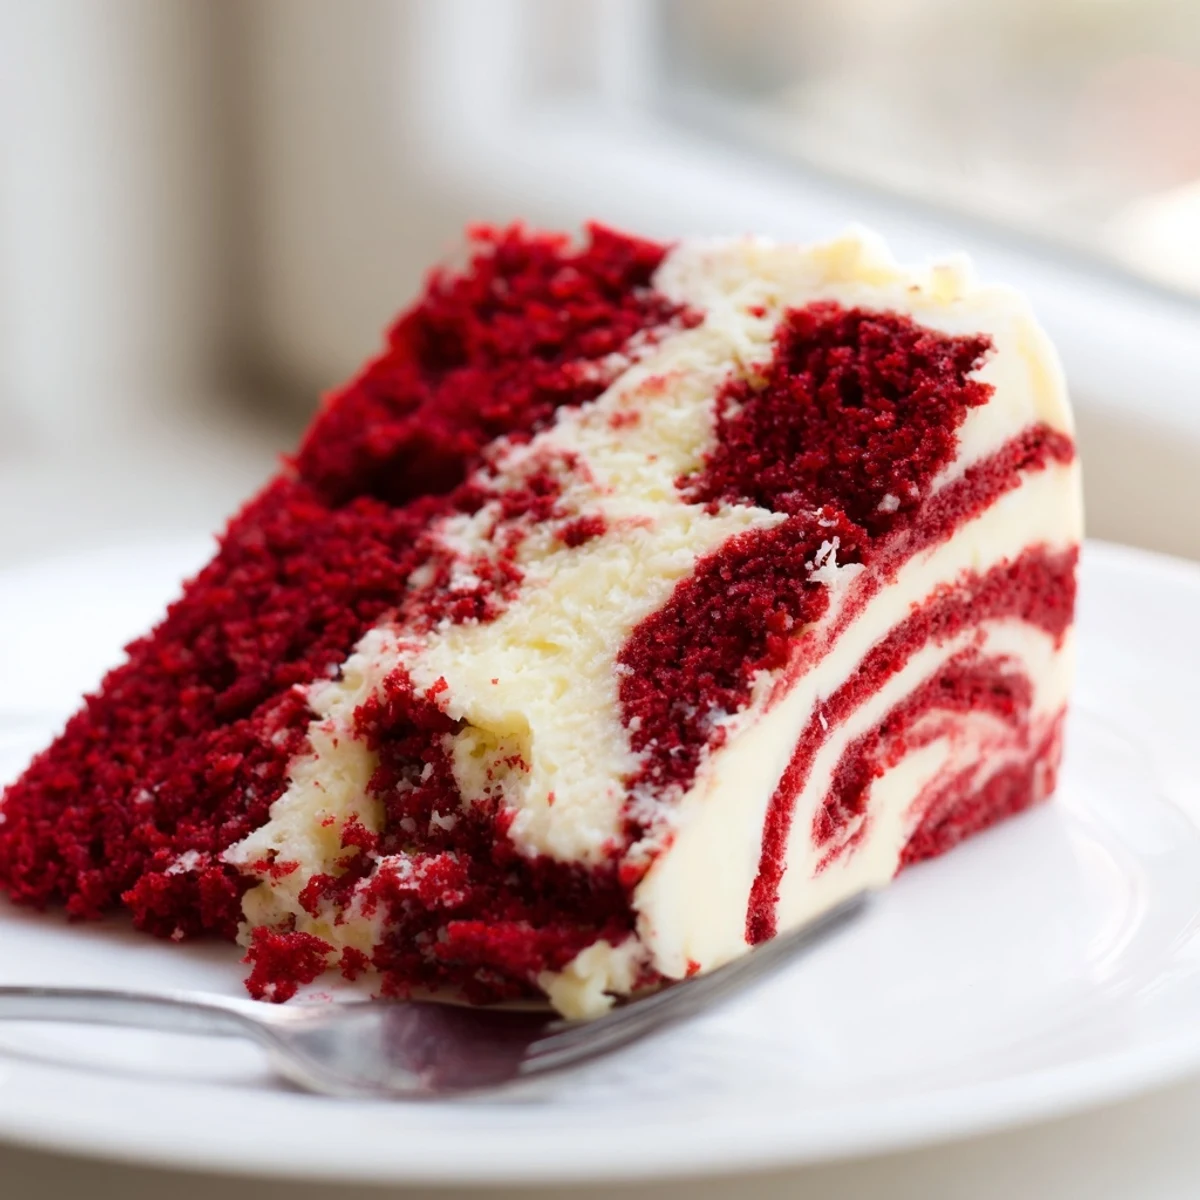
 This stunning dessert combines the classic appeal of moist red velvet cake with pockets of creamy cheesecake throughout. The marbled swirl pattern creates an impressive presentation perfect for birthdays, holidays, or any special gathering.
Preparation comes together in about 25 minutes with simple pantry staples and cream cheese. The buttermilk keeps the red velvet layers incredibly tender, while the cheesecake ribbons add tangy richness in every bite.
Serve chilled for the creamiest texture, or at room temperature for softer swirls. A dusting of powdered sugar elevates the presentation, though it's beautiful on its own.
The smell of red velvet baking always pulls me back to my aunt's kitchen, where she'd pull this magnificent marbled cake from the oven like it was nothing special. I stood on a step stool watching her swirl the cream cheese mixture into the crimson batter, completely mesmerized by how something so beautiful could come from such simple movements. That first bite revealed the magic—velvety chocolate tang meeting rich cheesecake in every single forkful.
Last Christmas, I brought this to a potluck and watched it disappear within twenty minutes. My cousin's husband, who claims he's not a dessert person, went back for a third slice and actually asked for the recipe. Something about that combination of familiar comfort cake and creamy cheesecake hits different when you're surrounded by people you love.
Ingredients
- 2 cups (250 g) all-purpose flour: The foundation of our tender cake crumb—measure by spooning into your measuring cup and leveling off for accuracy
- 1 ½ cups (300 g) granulated sugar: Sweetens both the cake and provides just enough structure without making it heavy
- 1 tsp baking powder and ½ tsp baking soda: This duo works together for the perfect rise—too much baking soda can turn your cake reddish-brown, so measure carefully
- 1 tbsp unsweetened cocoa powder: Just enough cocoa to give depth without overpowering that classic red velvet flavor profile
- ½ tsp salt: Enhances all the other flavors and balances the sweetness
- 1 cup (240 ml) buttermilk, room temperature: The secret to tender crumbs—its acidity activates the baking soda and creates that signature velvet texture
- ½ cup (120 ml) vegetable oil: Keeps the cake incredibly moist for days, unlike butter which can firm up when chilled
- 2 large eggs, room temperature: Essential for structure—bring them to room temp for better emulsification with the oil and buttermilk
- 2 tsp vanilla extract: Don't skimp here—pure vanilla makes all the difference in the final flavor
- 1 tsp white vinegar: Reacts with the buttermilk and baking soda for extra tenderness and that traditional red velvet tang
- 2 tbsp (30 ml) red food coloring: Gel coloring gives you that vibrant restaurant-quality red without adding excess liquid
- 8 oz (225 g) cream cheese, softened: Must be completely softened to room temp—cold cream cheese creates lumpy swirls that won't marble properly
- ⅓ cup (67 g) granulated sugar: Sweetens the cheesecake swirl just enough to complement without overpowering
- 1 large egg: Helps the cheesecake swirl set beautifully while staying creamy
- 1 tsp vanilla extract: Double the vanilla because the cheesecake layer deserves its own aromatic boost
Instructions
- Get your oven ready:
- Preheat to 350°F (175°C) and grease a 9x13-inch pan, then line with parchment paper—those overhanging edges become handles later for easy lifting.
- Whisk the dry ingredients together:
- In a large bowl, combine flour, sugar, baking powder, baking soda, cocoa powder, and salt—whisking ensures everything's evenly distributed before the wet ingredients hit.
- Mix up the wet ingredients:
- In a separate bowl, whisk buttermilk, oil, eggs, vanilla, vinegar, and red food coloring until the color is uniform and vibrant.
- Combine everything gently:
- Pour wet into dry and fold just until combined—overmixing develops gluten and makes tough cake, so stop when you no longer see dry flour.
- Spread the red velvet batter:
- Pour into your prepared pan and use an offset spatula to create an even layer—this base needs to be level for the prettiest marbling effect.
- Make the cheesecake swirl:
- Beat softened cream cheese until perfectly smooth, then add sugar, egg, and vanilla—mix until creamy and completely blended, about 2 minutes.
- Create the marble:
- Drop spoonfuls of cheesecake mixture all over the red velvet batter, then run a knife through in a figure-eight pattern—don't over-swirl or you'll lose the definition between layers.
- Bake to perfection:
- Bake 45-50 minutes until a toothpick comes out with just a few moist crumbs—remember the cheesecake portion stays slightly softer than the cake.
- Cool completely before slicing:
- Let the cake cool completely in the pan on a wire rack—at least 2 hours—so the cheesecake firms up enough to cut clean slices.
 Pin It
 My sister requested this for her birthday three years running, and now nobody in the family even asks what dessert she wants anymore. Seeing the red and cream swirls against her birthday candles has become its own kind of tradition—some recipes just become part of your story.
Making It Ahead
This cake actually improves overnight as the moisture distributes between the layers and the cheesecake firms up beautifully. Wrap it tightly once completely cooled and refrigerate up to 24 hours before serving—just bring it to room temperature for about 30 minutes for the softest texture.
Perfecting the Swirl
The secret to restaurant-worthy marbling is spacing your cheesecake dollops evenly across the batter before swirling—think polka dots covering the surface. Run your knife through only once or twice in a gentle figure-eight motion, then stop—resist the urge to keep swirling or you'll end up with a muddy mess instead of distinct red and cream patterns.
Serving Suggestions
A light dusting of powdered sugar right before serving makes this look professionally finished without much effort. The cake is stunning on its own, but a simple cream cheese glaze drizzled across the top takes it to another level of indulgence.
- Cut slices with a sharp knife wiped clean between cuts for the cleanest edges
- Serve slightly chilled if you prefer the cheesecake portion firmer
- Pair with fresh berries or a cup of strong coffee to balance the richness
 Pin It
 There's something deeply satisfying about slicing into that marbled pattern and seeing exactly what you created. This cake has become my go-to for moments that matter, and I hope it finds its way into your kitchen's story too.
Recipe FAQs
- → How do I achieve the perfect marble swirl?
-
Dollop spoonfuls of the cheesecake mixture over the red velvet batter, then use a knife or skewer to gently swirl through both layers. Make just 3-4 passes—over-swirling will blend the two batters together too much and lose the marble effect.
- → Can I make this ahead of time?
-
Absolutely. This actually tastes better after chilling overnight in the refrigerator. The flavors develop and the cheesecake firms up beautifully. Wrap tightly or store in an airtight container for up to 4 days.
- → What's the best way to get vibrant red color?
-
Gel food coloring provides the most vibrant hue with less liquid compared to traditional drops. Start with 1 tablespoon and add more if desired. The color will bake slightly darker than the raw batter appears.
- → Why is my cake dense or dry?
-
Overmixing the batter can create a dense texture. Mix just until combined—some small lumps are fine. Also, avoid overbaking; check at 45 minutes since the cheesecake portion stays moist longer than regular cake.
- → Can I freeze this dessert?
-
Yes, freeze individual slices or the entire cake (well-wrapped) for up to 2 months. Thaw overnight in the refrigerator. The texture may be slightly denser after freezing but remains delicious.
- → What toppings work well?
-
A light dusting of powdered sugar is classic. For extra indulgence, drizzle with cream cheese glaze or whipped cream. Fresh berries like raspberries or strawberries complement the flavors beautifully too.
