 Pin It
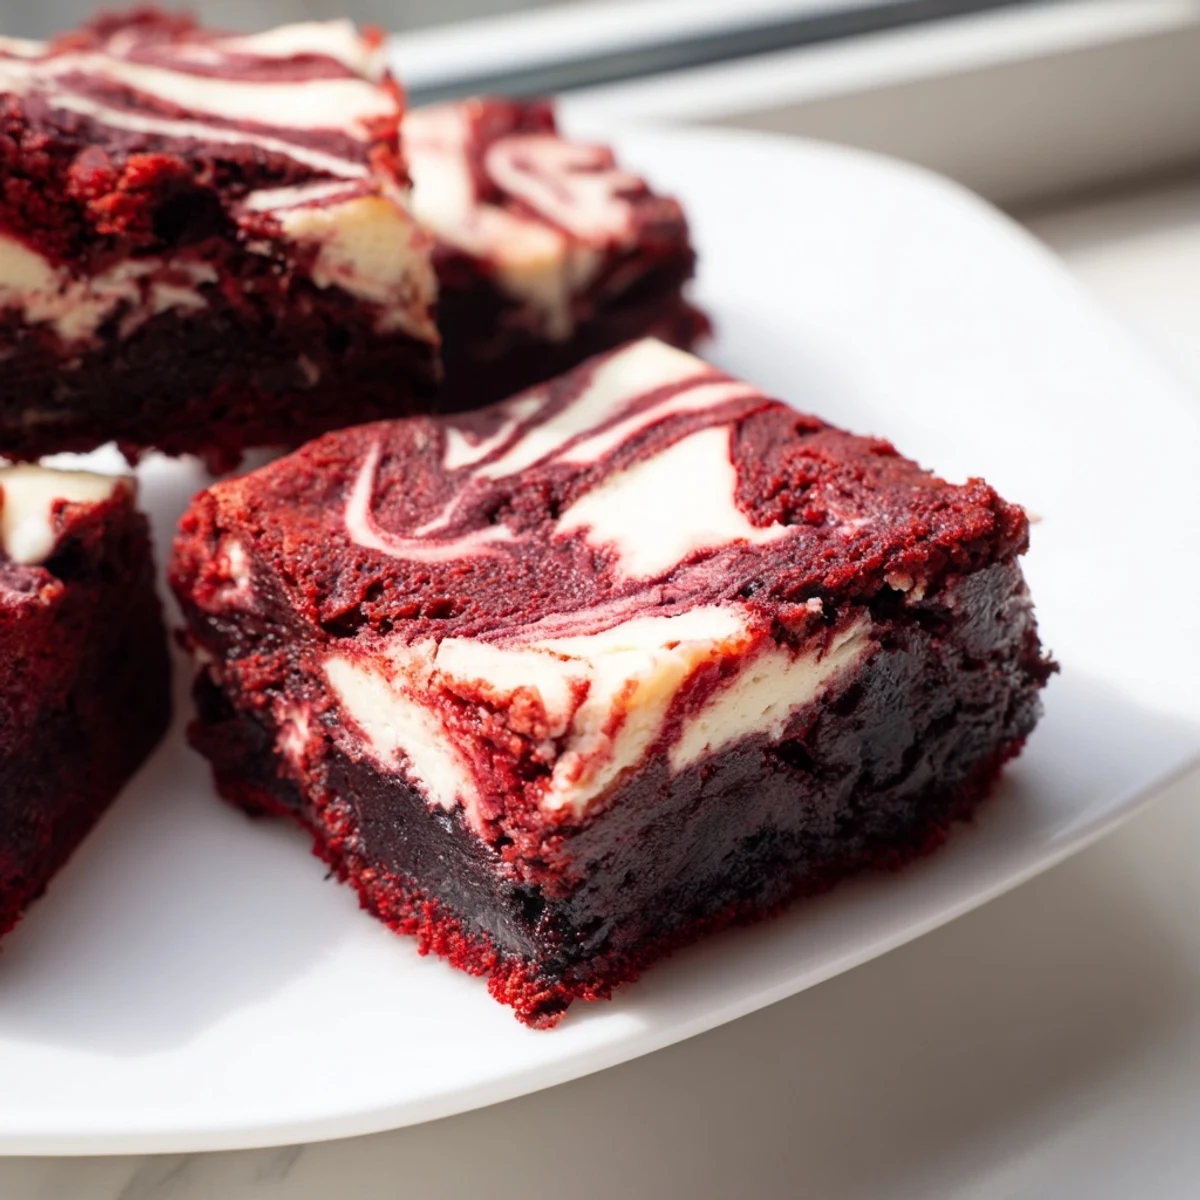
 These indulgent red velvet cheesecake brownies combine the best of both worlds—rich, fudgy chocolate-red velvet batter meets velvety smooth cheesecake in a stunning marbled pattern. The result is a visually striking dessert with contrasting textures and flavors that will impress at any gathering.
The preparation involves making two separate batters: a vibrant red velvet brownie base and a classic creamy cheesecake layer. The magic happens when you swirl them together before baking, creating those beautiful marble patterns that make each square unique.
The first time I brought these to a dinner party, my friend Sarah actually gasped when I cut into the pan. That marble pattern somehow feels almost too pretty to eat, until you take that first bite and the cream cheese hits your tongue.
I started making these back when I had a tiny apartment kitchen and needed something impressive for potlucks that would travel well. Now they are my go to whenever I want to bake something that feels special without the stress of layer cakes or fancy techniques.
Ingredients
- Unsalted butter: Melted butter creates that dense fudgy texture we want in the brownie layer, and I always take it out of the microwave a few seconds early so it is not piping hot
- Granulated sugar: The sugar does double duty here sweetening both layers and creating that gorgeous crackly top on the brownie portion
- Large eggs: Room temperature eggs incorporate much better into both batters, so I set mine out about thirty minutes before I start baking
- Vanilla extract: Do not skimp on quality here since vanilla bridges the gap between the chocolate and cream cheese flavors
- Red food coloring: Gel coloring gives you that vibrant red without adding extra liquid, though traditional liquid works in a pinch
- All purpose flour: Measuring by weight rather than volume keeps these brownies tender rather than cakey or tough
- Unsweetened cocoa powder: Dutch process cocoa gives you that deep red velvet color, but natural cocoa works perfectly fine too
- Salt: Just a quarter teaspoon wakes up all the flavors and keeps these from tasting flat or overly sweet
- Cream cheese: Full fat cream cheese softened to room temperature makes the swirl layer creamy rather than grainy or dense
Instructions
- Prep your pan and heat the oven:
- Set your oven to 350°F and line an 8x8 inch pan with parchment paper, letting the paper hang over two opposite sides like handles for easy lifting later
- Mix the brownie batter:
- Whisk melted butter and sugar in a large bowl until smooth, then add eggs, vanilla, and red food coloring and whisk until the mixture is uniform in color
- Add the dry ingredients:
- Sift flour, cocoa powder, and salt directly into the wet ingredients and fold gently with a spatula just until no dry streaks remain
- Layer the brownie base:
- Set aside 1/4 cup of the red velvet batter for the top, then spread the rest evenly in your prepared pan
- Make the cheesecake swirl:
- Beat softened cream cheese with sugar until completely smooth, then add the egg and vanilla and mix until the mixture is glossy and creamy
- Add the cream cheese layer:
- Pour the cheesecake mixture over the brownie batter and spread it into an even layer with an offset spatula or the back of a spoon
- Create the marble effect:
- Drop spoonfuls of the reserved red velvet batter over the cream cheese, then run a knife or skewer through the dollops in swirling motions to marble the two layers together
- Bake to perfection:
- Bake for 33 to 36 minutes until the center is just set and a toothpick comes out with a few moist crumbs but not wet batter
- Cool completely:
- Let the brownies cool completely in the pan on a wire rack before lifting them out using the parchment paper handles and cutting into squares
 Pin It
 My niece now requests these for every family birthday instead of cake. She says the swirled pattern looks like magic and honestly, watching people discover that cream cheese layer never gets old.
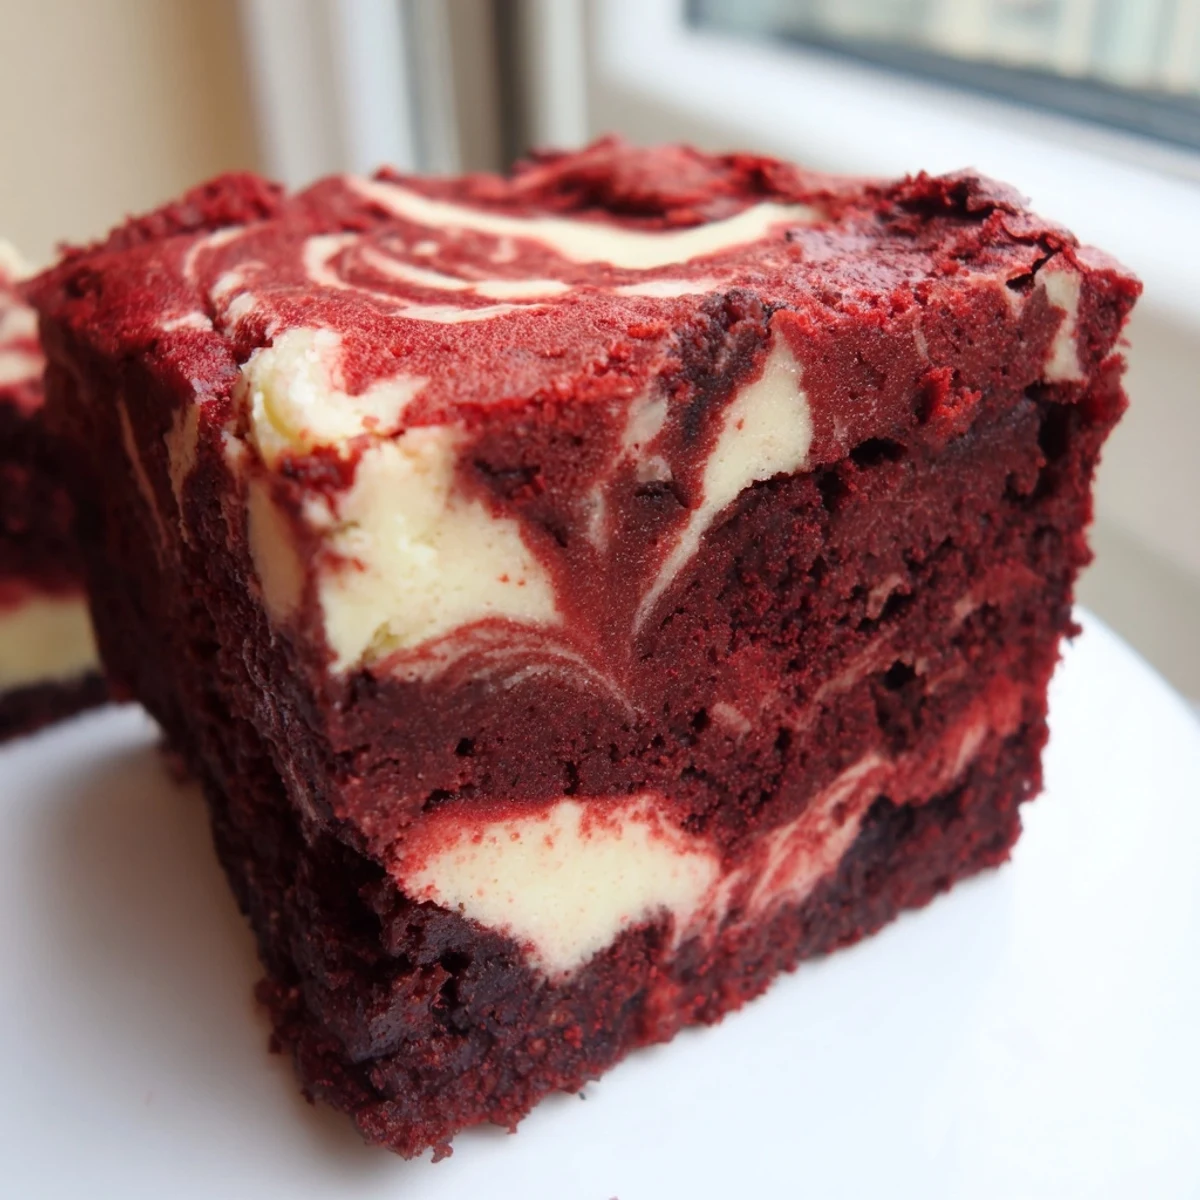
Getting The Marble Pattern Right
I used to overthink the swirling step and create muddy patterns instead of clean marbling. Now I drop just five or six generous spoonfuls of the red batter on top and make three or four simple figure eight motions through the pan. Less manipulation gives you those dramatic distinct swirls that look so striking when you slice into the finished brownies.
Temperature Matters For Serving
These taste completely different depending on how you serve them. Chilled from the fridge, the cream cheese layer becomes almost like a dense cheesecake and the brownie portion gets wonderfully fudgy. At room temperature, the texture softens into something more like a thick cake. I like to let them sit out for about twenty minutes before serving so you get the best of both worlds.
Storage And Make Ahead Tips
These actually improve after a night in the refrigerator as the flavors meld together and the texture becomes more dense and fudgy. The parchment handles make it easy to lift the entire slab out for cutting.
- Wrap the uncut slab tightly in plastic and refrigerate for up to 5 days
- Freeze individual squares wrapped in plastic then foil for up to 3 months
- Let frozen brownies thaw overnight in the refrigerator before serving
 Pin It
 Hope these bring a little swirl of joy to your kitchen table.
Recipe FAQs
- → How do I know when the brownies are done baking?
-
Insert a toothpick into the center—it should come out with a few moist crumbs but not wet batter. The edges should be set while the center has a slight jiggle.
- → Can I make these ahead of time?
-
Absolutely! These actually taste better after chilling overnight in the refrigerator. The flavors meld together and the texture becomes wonderfully firm and fudgy.
- → Why did my cheesecake layer sink into the brownie batter?
-
This can happen if the brownie batter is too thin. Make sure to fold the flour mixture gently until just combined—overmixing can thin the batter. Also, ensure the cream cheese is properly softened for even spreading.
- → Can I use natural food coloring instead of red dye?
-
Beet juice or pomegranate juice can work as natural alternatives, though the color will be more subtle. You may need to increase the amount and the flavor profile might shift slightly.
- → How should I store these brownies?
-
Store in an airtight container in the refrigerator for up to 5 days. They can also be frozen for up to 3 months—wrap individual squares in plastic wrap and place in a freezer-safe bag.
- → What's the best way to get clean cuts?
-
Chill the brownies completely before cutting. Use a sharp knife wiped clean between cuts, or try dipping the knife in hot water for extra smooth slices.
