 Pin It
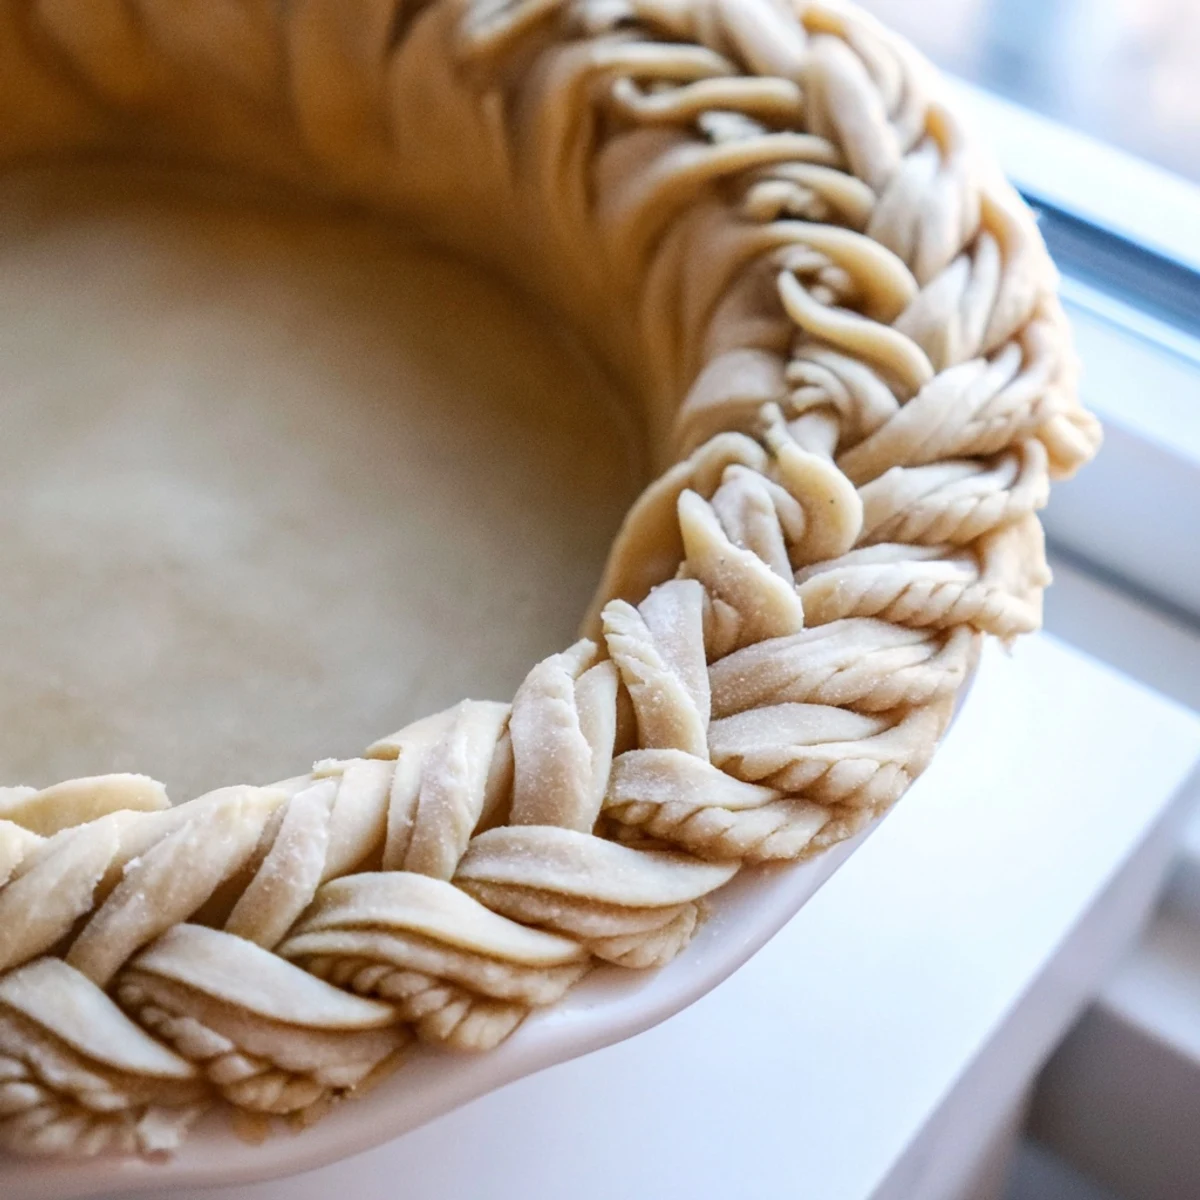
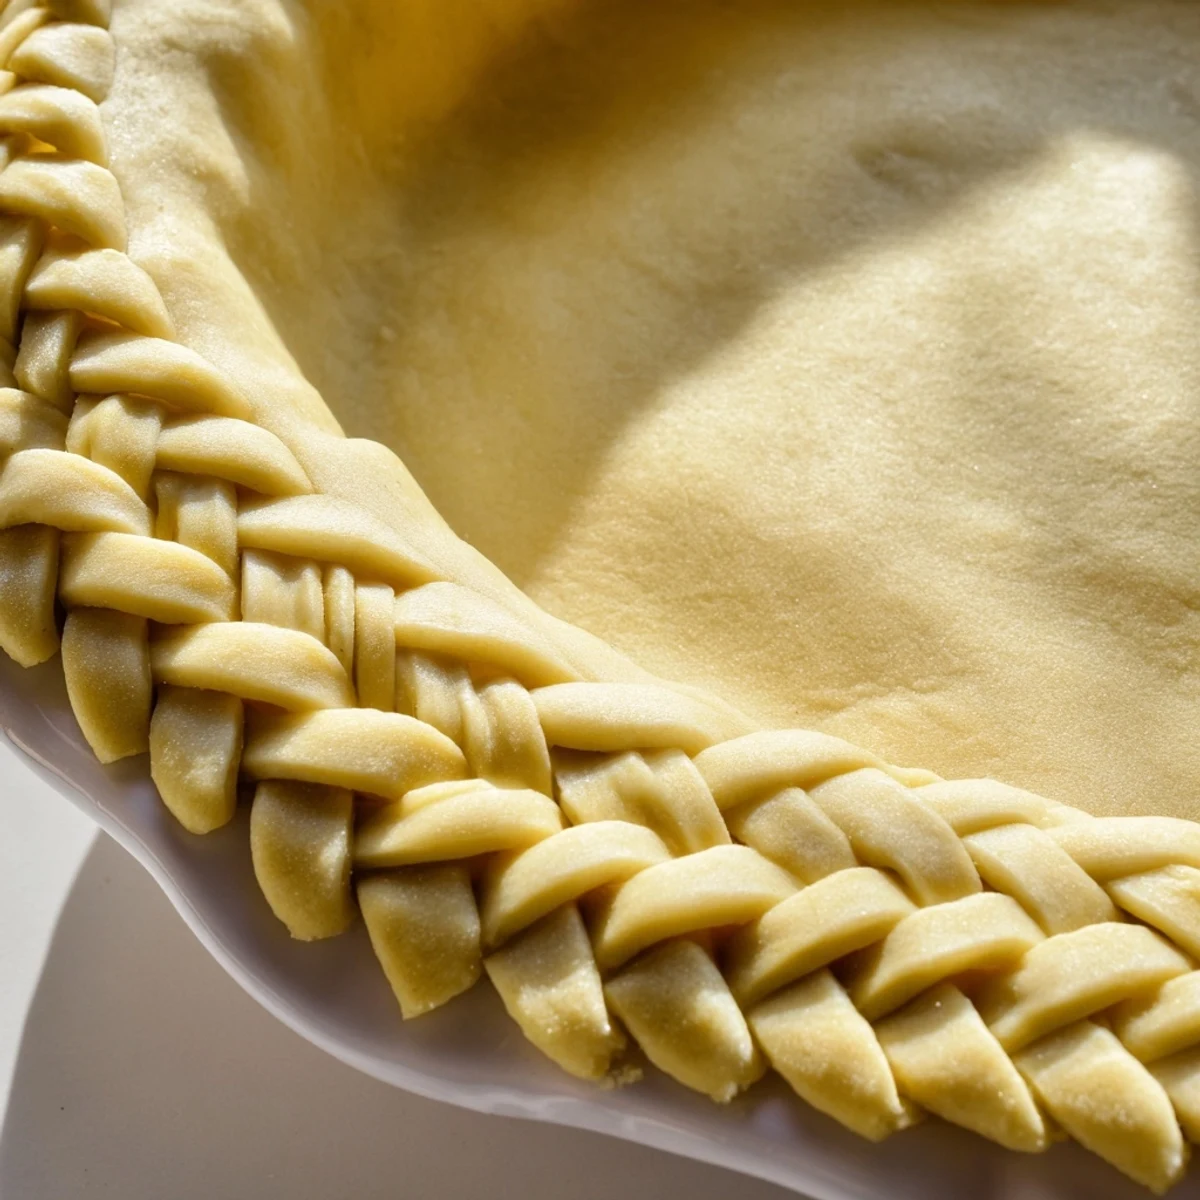
 Master the art of creating a visually stunning fishtail braid pie crust that elevates any homemade pie. This decorative technique involves weaving four strips of pastry dough in an intricate crossover pattern, producing an elegant braided edge that bakery professionals use. The process requires basic pie dough preparation, careful strip cutting, and patience during braiding. The result is a professional-looking crust that adds sophistication to fruit pies, custards, quiches, or savory tarts. The technique works with any standard pie dough recipe and can be adapted for different crust thicknesses. Blind baking ensures the decorative elements hold their shape while achieving golden perfection.
The first time I attempted a fishtail braid on a pie crust, my kitchen looked like a flour bomb had gone off. I had seen those gorgeousInstagram photos of woven masterpieces and thought, how hard can it be? Two hours later, my braids were uneven, my fingers were cramped, and I had learned that pastry requires both patience and acceptance of imperfection.
Last Thanksgiving, I brought this braided apple pie to my sisters house. Her father-in-law, who has been baking pies longer than I have been alive, actually stopped eating to ask how I managed that lattice work. The proud moment was slightly undercut when I admitted it took me three tries to get one section right, but honestly, that is part of the charm.
Ingredients
- All-purpose flour: The backbone of any good crust, keeping everything cold is what makes it flaky
- Cold unsalted butter: Those visible butter pockets are what create the beautiful layers in your baked crust
- Salt: Just enough to make the flavors sing without tasting salty
- Sugar: A subtle sweetness that helps with browning and balances savory fillings
- Ice water: The colder the better, this brings the dough together without developing gluten
- Egg and milk: For that gorgeous golden finish that makes people think you are a professional
Instructions
- Make the dough foundation:
- Whisk your flour, salt, and sugar in a large bowl, then work in that cold butter until the mixture looks like coarse crumbs with some pea-sized pieces remaining
- Bring it together:
- Drizzle in ice water a tablespoon at a time, mixing gently until the dough just holds together when squeezed, then divide and chill for at least an hour
- Prep your canvas:
- Roll one disc to fit your pie plate, press it in gently, trim the edges, and let it chill while you work your magic on the braids
- Create your strips:
- Roll the second disc to about 1/4 inch thick and cut twelve long, even strips roughly 1/2 inch wide, grouping them into sets of four
- Master the fishtail:
- With strips numbered 1-2-3-4 from left to right, cross strip 1 over 2, under 3, over 4, then repeat with the new leftmost strip until fully braided
- Adorn your pie:
- Carefully transfer each braid to the chilled crust edge, pressing gently to seal and using a dab of water if needed to help them stick
- Chill and shine:
- Give the whole pie a 15 minute chill in the freezer, brush with egg wash, and bake at 400 degrees until deeply golden
 Pin It
 My daughter now requests the braided crust for her birthday pie every year. She sits beside me, flour-dusted and focused, as we work through the fishtail pattern together. Some of our braids turn out tighter than others, some sections get a little dark in the oven, but we have learned that the joy is in the making, not the perfection.
Making It Your Own
Once you have the basic fishtail rhythm down, try mixing up the aesthetic. A cinnamon-sugar dusting over the egg wash creates a sparkling finish that pairs beautifully with apple or pear fillings.
Timing Is Everything
The most common mistake I see is rushing the chilling steps. That initial hour in the fridge and the final 15 minutes in the freezer are what keep your braids distinct and beautiful rather than melting into each other.
Troubleshooting The Braid
If your strips keep breaking or the braid feels tight, let the dough warm for just 2-3 minutes on the counter before continuing. The sweet spot is cold but workable.
- Keep a small bowl of ice water nearby to moisten your fingertips if the dough starts feeling dry or cracking
- If a strip tears, gently press it back together, the braid pattern hides most imperfections beautifully
- Remember that the egg wash will mask minor flaws and create a uniform golden finish
 Pin It
 There is something deeply satisfying about pulling a braided pie from the oven, golden and gorgeous. Serve it with confidence, you have earned every compliment coming your way.
Recipe FAQs
- → What is a fishtail braid technique?
-
A fishtail braid is a weaving method using four pastry strips crossed over and under each other in a specific pattern. The left-most strip crosses over the adjacent strip, then under the next, creating an intricate herringbone-style weave that resembles a fishtail when completed.
- → How thick should pastry strips be?
-
Cut strips approximately 1/2 inch (1.25 cm) wide and roll dough to 1/4 inch (6 mm) thickness. This ensures strips are manageable for braiding while baking evenly without burning before the rest of the crust.
- → Can I make this ahead of time?
-
Yes, prepare the braided crust up to 24 hours in advance. After assembly, wrap tightly and refrigerate. For longer storage, freeze unbaked for up to 3 months. Thaw in refrigerator before baking.
- → Do I need blind baking?
-
Blind baking is recommended for custard pies or fillings requiring shorter baking time. Line with parchment, add weights, and bake at 400°F for 12-15 minutes until golden. This prevents soggy bottoms and ensures the braid maintains shape.
- → What fillings work best?
-
This decorative crust pairs beautifully with fruit pies like apple, cherry, or berry. It also complements savory options such as quiches, chicken pot pies, and vegetable tarts. Avoid extremely wet fillings that might seep under the braid.
- → How do I prevent braids from separating?
-
Chill dough thoroughly before braiding and use a small amount of water or beaten egg to seal edges where braids meet the main crust. A final 15-minute chill before baking helps everything adhere properly.
