 Pin It
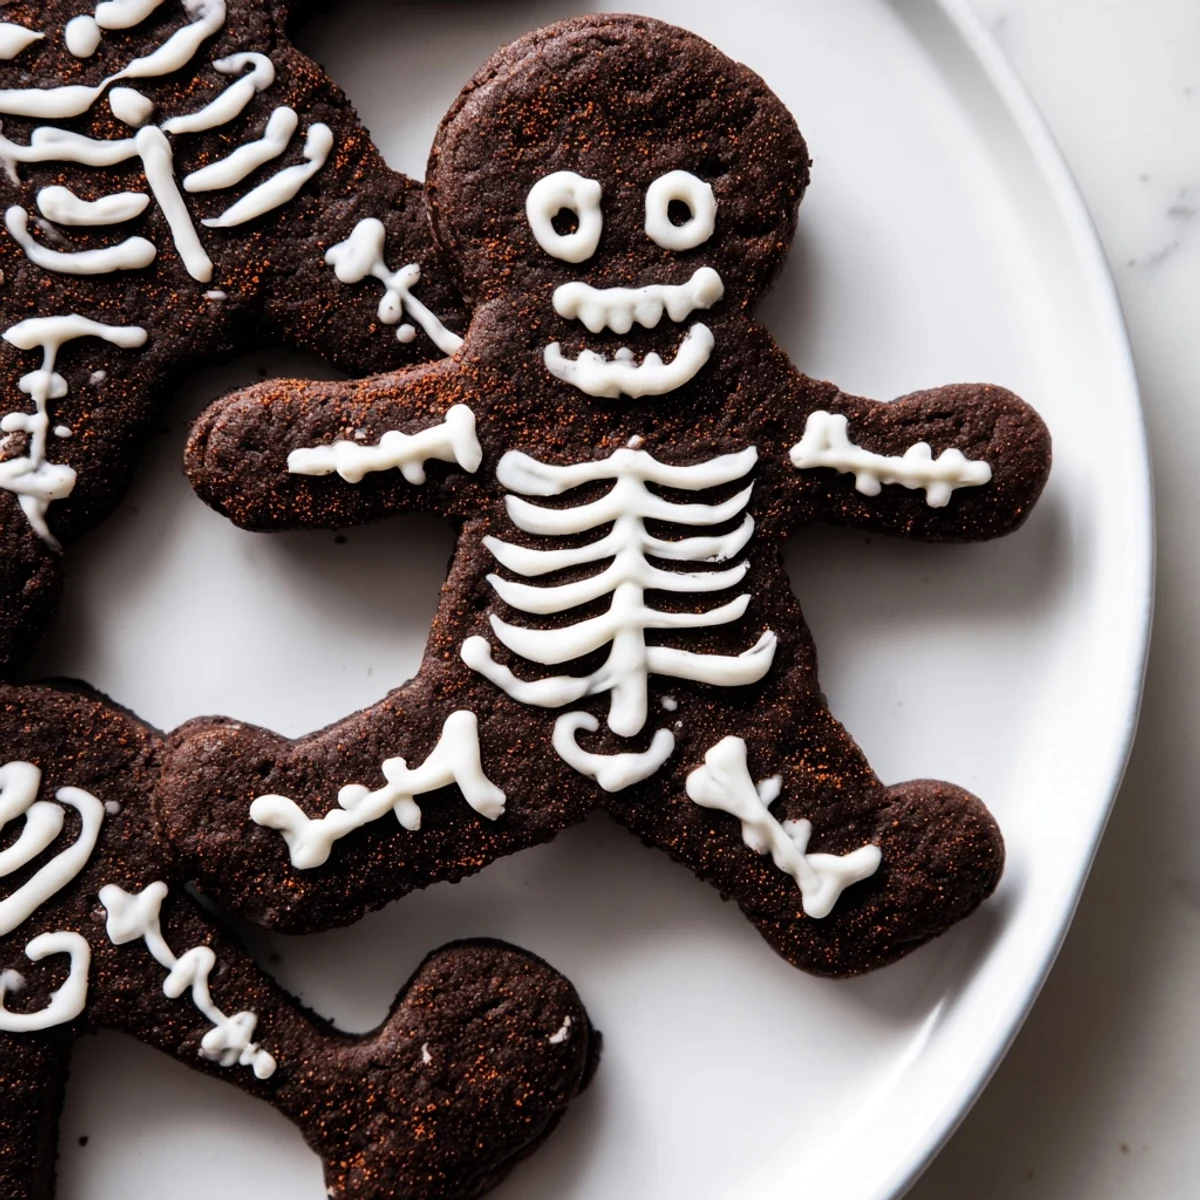
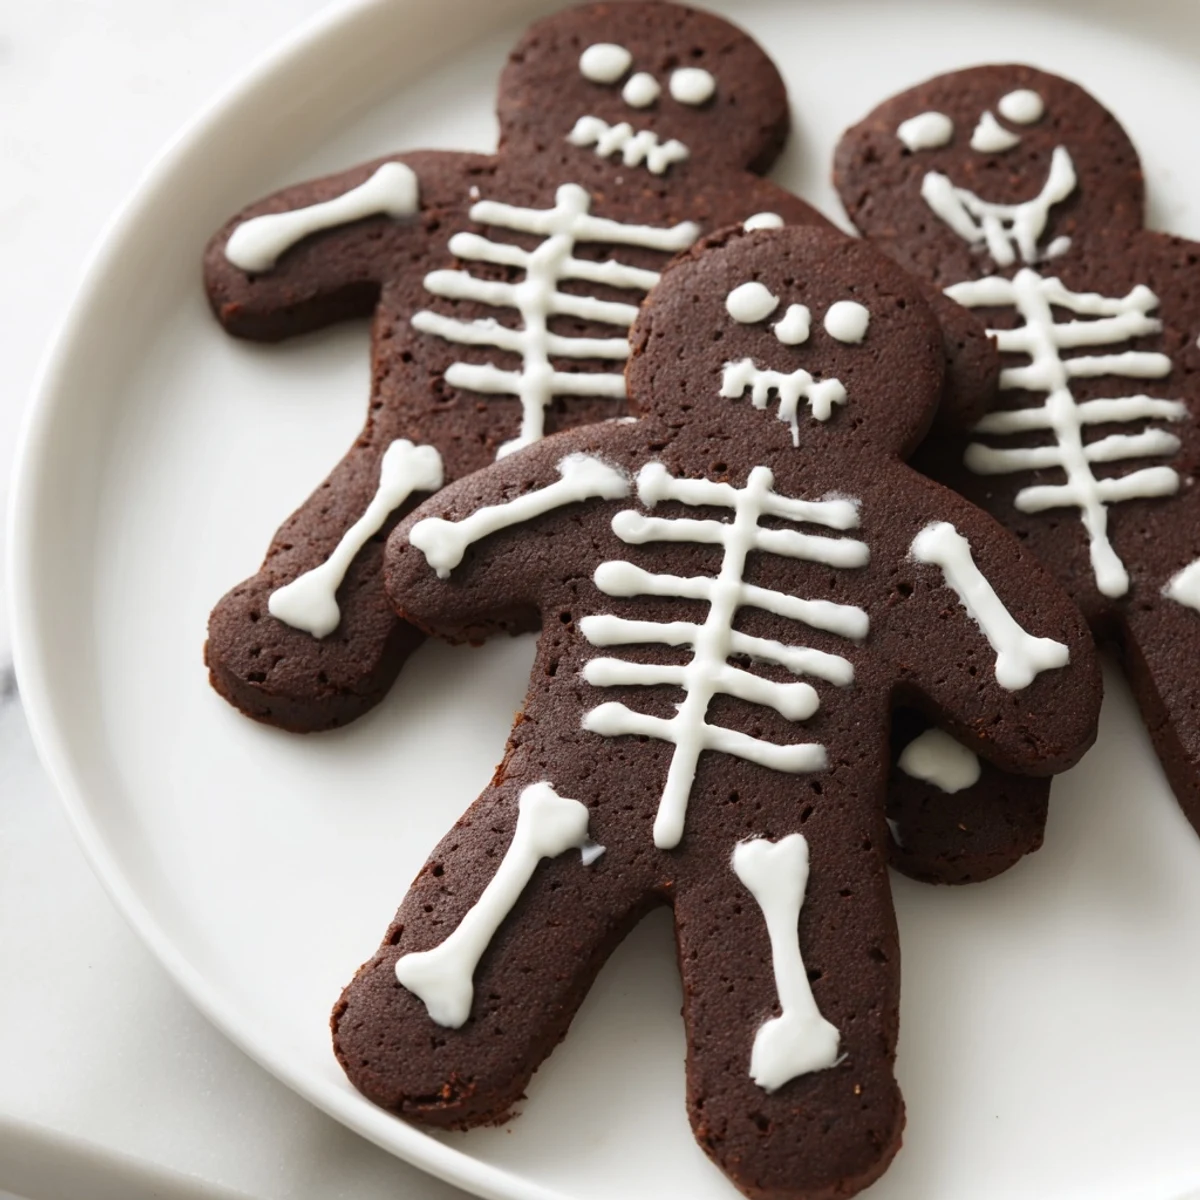
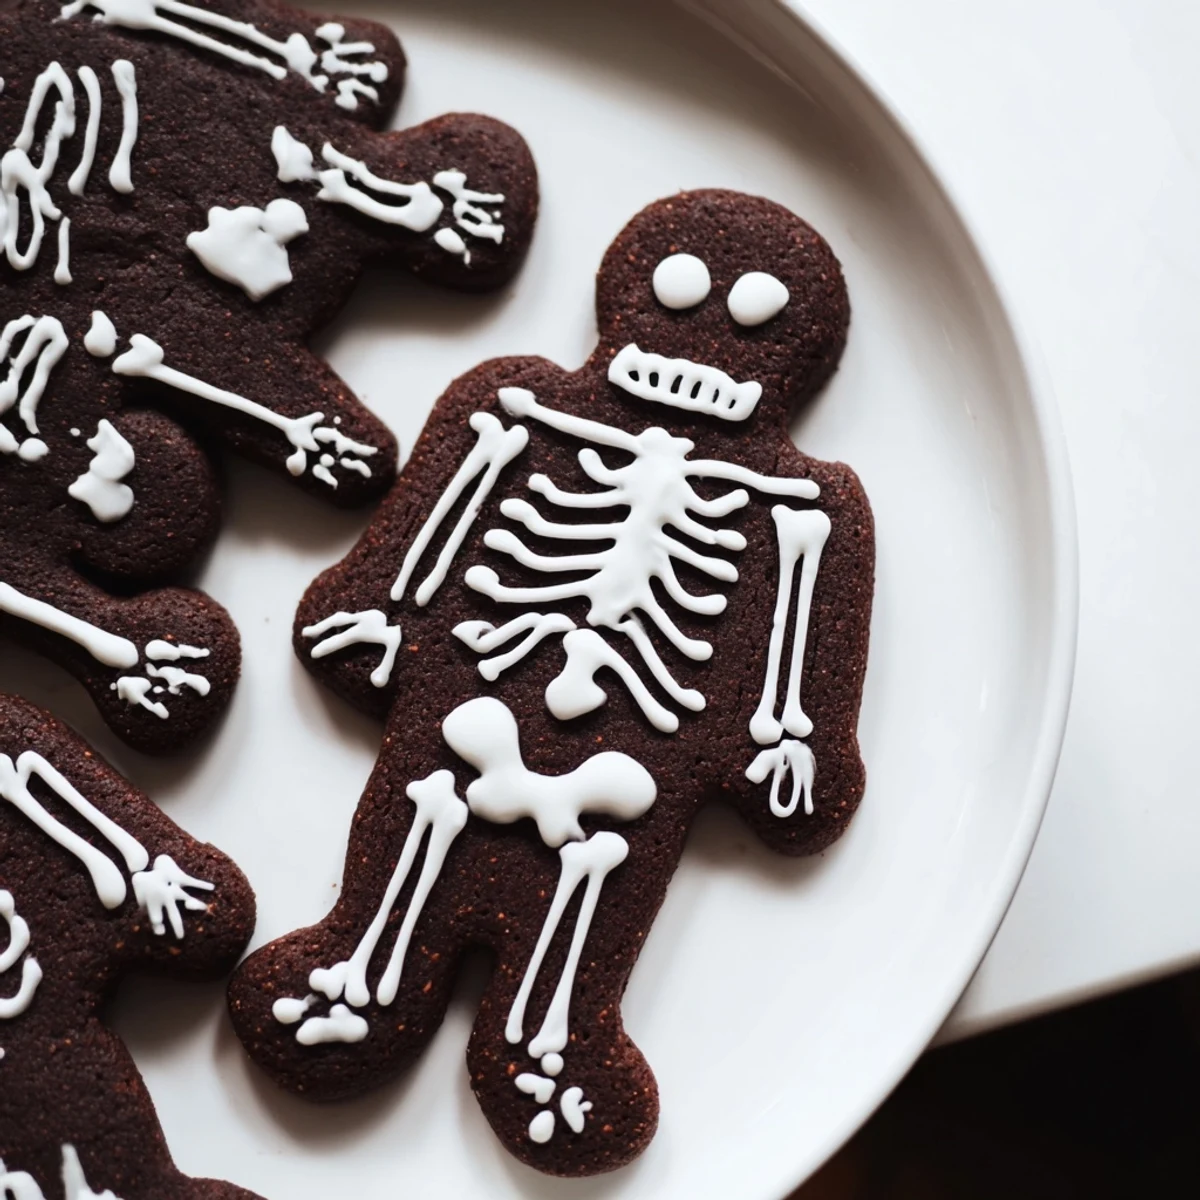
 Create these delightfully spooky chocolate cinnamon skeleton cookies for your next Halloween gathering. The rich cocoa dough is perfectly balanced with warm cinnamon spice, cut into skeleton shapes and decorated with royal icing for a playful touch.
The dough comes together quickly and requires chilling for easier rolling. Bake until firm, then pipe skeleton details using simple royal icing. These treats are ideal for Halloween parties, school events, or anytime you want to add some whimsical fun to your baking.
For extra warmth, add a pinch of cayenne pepper to the dough, or decorate with white chocolate chips for additional flair. Store in an airtight container for up to a week.
The first time I made these skeleton cookies, my kitchen smelled like a chocolate factory had collided with a Mexican bakery. That cinnamon-cocoa combination is absolutely bewitching, and watching people's faces when they realize these cute little skeletons pack such a sophisticated flavor punch? That's the real treat.
Last Halloween, I set up a decorating station on my dining table and watched three grown adults get completely lost in piping tiny rib cages and grinning skulls onto these cookies. Someone may have gotten icing in their hair, but nobody minded because we were all having too much fun channeling our inner cookie artists.
Ingredients
- All-purpose flour: The structural backbone that keeps your skeletons from losing their shape in the oven
- Unsweetened cocoa powder: Dont skip the sifting step or youll end up with tiny chocolate speckles throughout your dough
- Ground cinnamon: This is the secret ingredient that makes these taste special rather than just like regular chocolate cookies
- Baking powder and salt: Just enough to give the cookies a subtle lift without making them cakey or puffy
- Unsalted butter: Room temperature is non-negotiable here—cold butter will give you a nightmare to work with
- Granulated sugar: Creates that perfect crisp edge while keeping the centers tender
- Egg and vanilla: The egg provides structure while vanilla rounds out all those chocolate notes
- Powdered sugar: Sifting is crucial for silky smooth royal icing without any lumps
- Egg white: Fresh egg whites work beautifully but meringue powder is a great alternative if youre concerned about raw eggs
- Water: Start with less and add more gradually until you reach that perfect pipeable consistency
Instructions
- Whisk the dry ingredients together:
- In a medium bowl, combine the flour, cocoa powder, cinnamon, baking powder, and salt until everything is evenly distributed and you can see those pretty cinnamon speckles throughout the dark cocoa.
- Cream the butter and sugar:
- Beat the butter and sugar in a large bowl for about 2 minutes until its pale and fluffy, then add the egg and vanilla, mixing until the mixture looks silky and combined.
- Form the dough:
- Gradually add the dry ingredients to the wet mixture, mixing just until a dough forms—dont overmix or these cookies will be tough instead of tender.
- Chill the dough:
- Divide the dough in half, flatten each portion into disks, wrap tightly in plastic, and refrigerate for at least 30 minutes so its firm enough to roll without sticking to everything.
- Preheat and prepare:
- Preheat your oven to 350°F (175°C) and line your baking sheets with parchment paper so you dont have to worry about cookies sticking or cleanup later.
- Roll and cut:
- Roll the dough out to 1/4 inch thickness on a lightly floured surface, then cut out your skeleton shapes using a gingerbread man or skeleton cookie cutter.
- Bake to perfection:
- Place cookies on the prepared baking sheets and bake for 10-12 minutes until the edges are set—let them cool completely on a wire rack before decorating or the icing will slide right off.
- Make the royal icing:
- Beat the egg white (or meringue powder) with powdered sugar and water until smooth and pipeable, then transfer to a piping bag fitted with a fine tip.
- Decorate your skeletons:
- Pipe skeleton-style designs onto each cooled cookie and let them dry completely before stacking or serving.
 Pin It
 My niece asked if we could make 'dead people cookies' for her class Halloween party, and I've never seen a group of eight-year-olds so excited about eating something with chocolate-cinnamon flavor. The teacher even asked for the recipe, which I consider the ultimate compliment.
Getting That Perfect Skeleton Look
The trick to skeleton cookies that actually look like skeletons is using a piping bag with a really fine tip and working slowly. I like to start with the rib cage first, then add the skull, and finish with the limb bones—it helps keep everything proportional and symmetrical.
Make-Ahead Magic
You can make the dough up to three days ahead and keep it wrapped tightly in the refrigerator, or freeze it for up to a month. Just let it thaw in the fridge overnight before rolling, and youll have fresh-baked skeleton cookies whenever the mood strikes.
Spicing Things Up
That optional pinch of cayenne pepper is a game-changer if you like things with a little kick. The heat builds slowly and makes the chocolate flavor absolutely sing without being overwhelming.
- If your royal icing starts to harden in the bag, add a single drop of water and massage the bag gently
- These cookies ship surprisingly well if you pack them between layers of parchment paper in a sturdy tin
- The dough scraps can be rerolled twice before the cookies start getting tough—after that, bake the scraps as taste-tester cookies
 Pin It
 Theres something deeply satisfying about turning simple ingredients into something that makes people smile before they even take a bite. These cookies have become my go-to for any gathering where I want to serve something that feels special without taking myself too seriously.
Recipe FAQs
- → Can I make the cookie dough ahead of time?
-
Yes, you can prepare the dough up to 2 days in advance. Wrap it tightly in plastic wrap and refrigerate. Let it soften slightly at room temperature before rolling out for easier handling.
- → What if I don't have a skeleton cookie cutter?
-
Gingerbread man cutters work perfectly for creating skeleton shapes. You can also freehand draw simple skeleton outlines on paper, cut them out, and use as a template to cut around with a sharp knife.
- → Can I use meringue powder instead of egg white in the icing?
-
Absolutely. Use 2 tablespoons of meringue powder mixed with the powdered sugar and water. This creates a stable, food-safe icing that's perfect for detailed decorating and sets firmly.
- → How should I store the decorated cookies?
-
Once the royal icing is completely dry and set (about 2-4 hours), store cookies in an airtight container at room temperature. Place parchment paper between layers to prevent smudging. They'll stay fresh for up to a week.
- → Can I freeze these cookies?
-
Freeze undecorated baked cookies in freezer bags for up to 3 months. Thaw at room temperature before decorating with royal icing. It's best to decorate after thawing for the crispest skeleton details.
- → Why is my dough too sticky to roll?
-
If the dough feels sticky, it may need more chilling time. Refrigerate for an additional 15-30 minutes until firm but pliable. Lightly flour your work surface and rolling pin to prevent sticking without adding too much flour to the dough.
